
Outdoor Living · Installation
Shade Sail Installation Guide
A step-by-step guide to corner hardware, cable connections, tensioning and securing your shade sail.
Before you begin
This guide illustrates cable-edge and Keder sail assembly after suitable structural anchors are installed. Posts, foundations, building connections, required engineering and applicable city approvals must be confirmed for your site. Follow the project drawings and current hardware manufacturer’s instructions for ratings, thread engagement, cable clamps and tension. We are happy to discuss these details before you start.
Our sails arrive with the perimeter cable installed. If your supplied sail needs cable threading, confirm the method before assembly.
Discuss your installationPhotographs have been retouched for clarity. Select an image to enlarge it; original reference photographs are available beneath the enhanced images.
Step 1: Attach the Corner Hardware
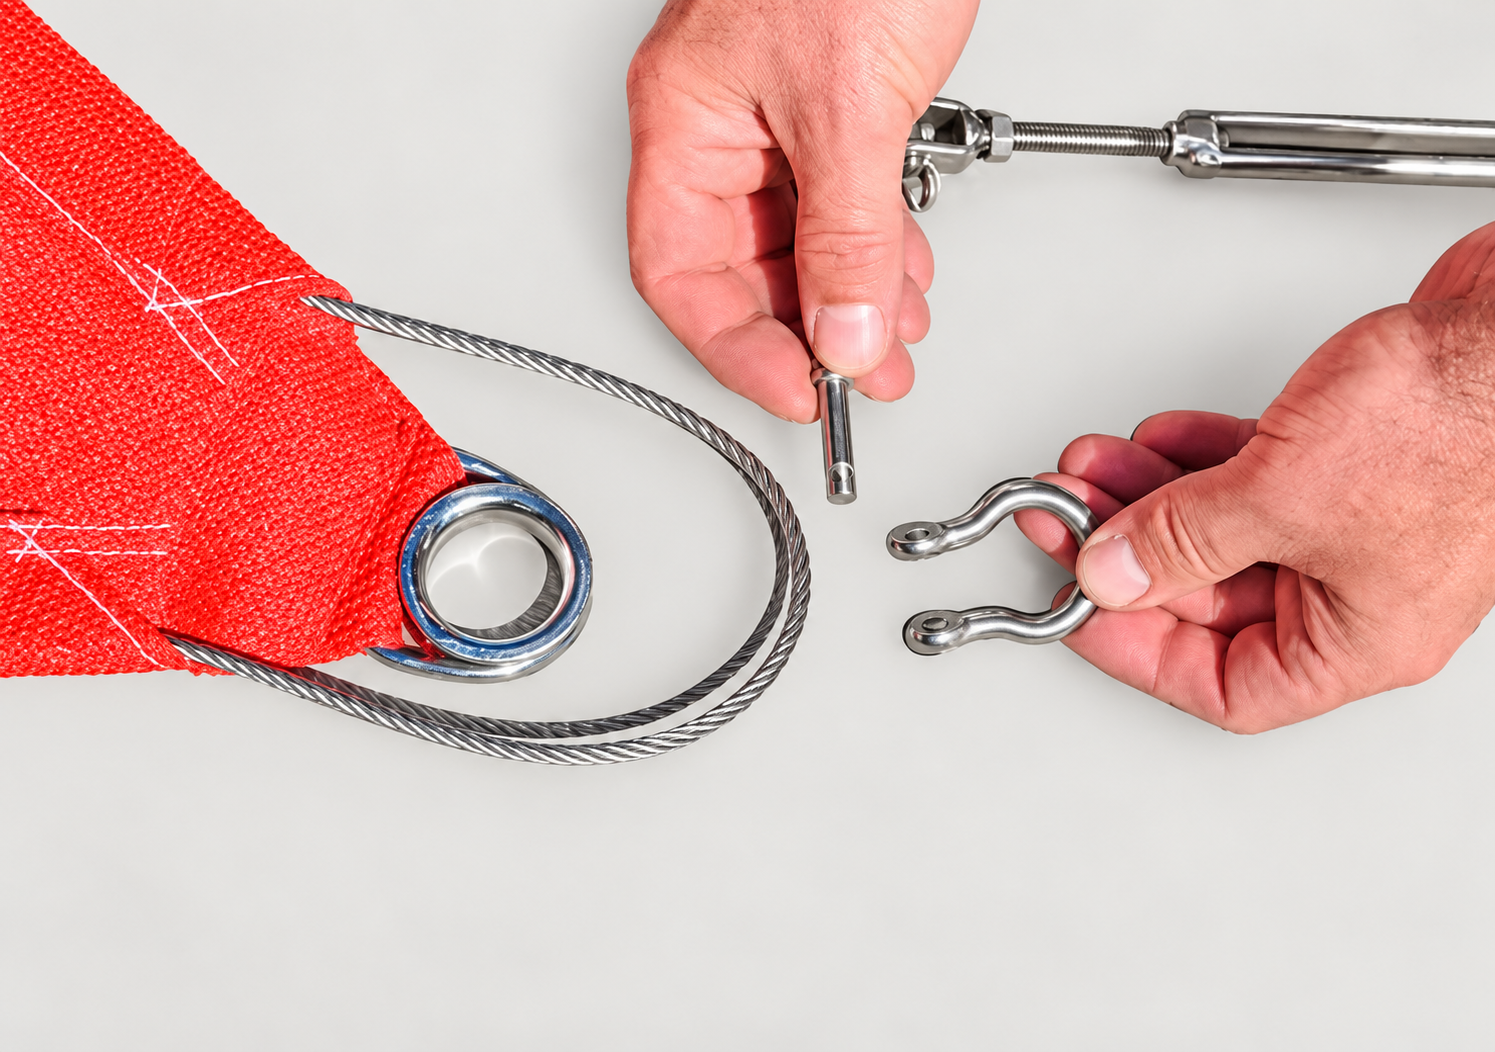
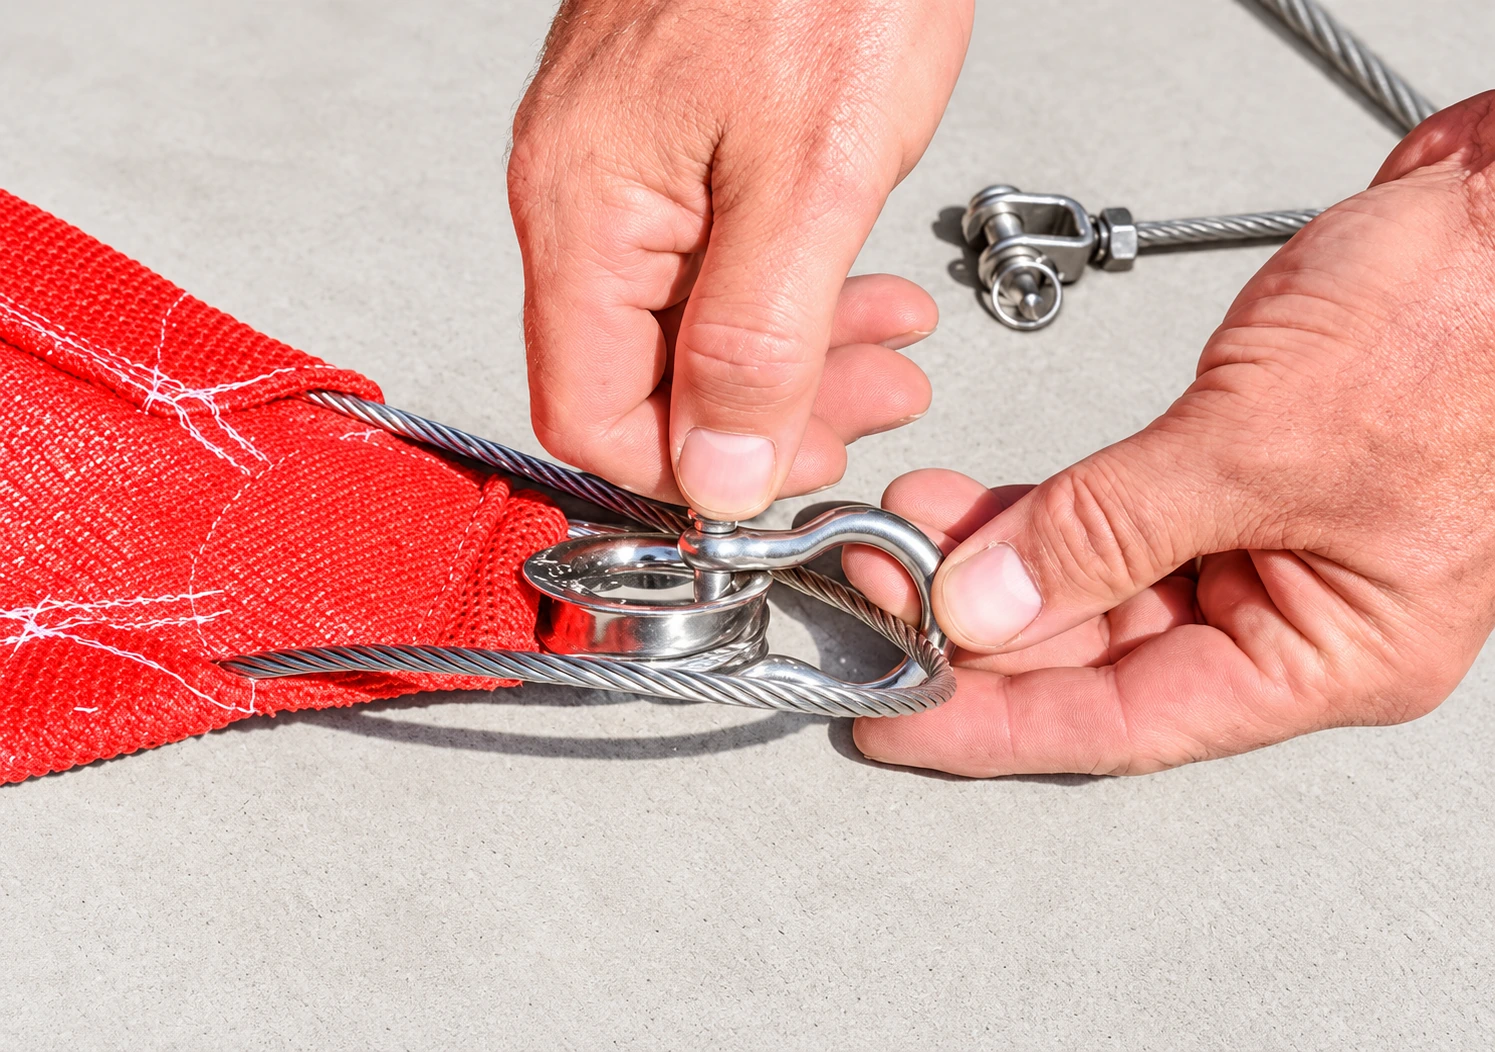
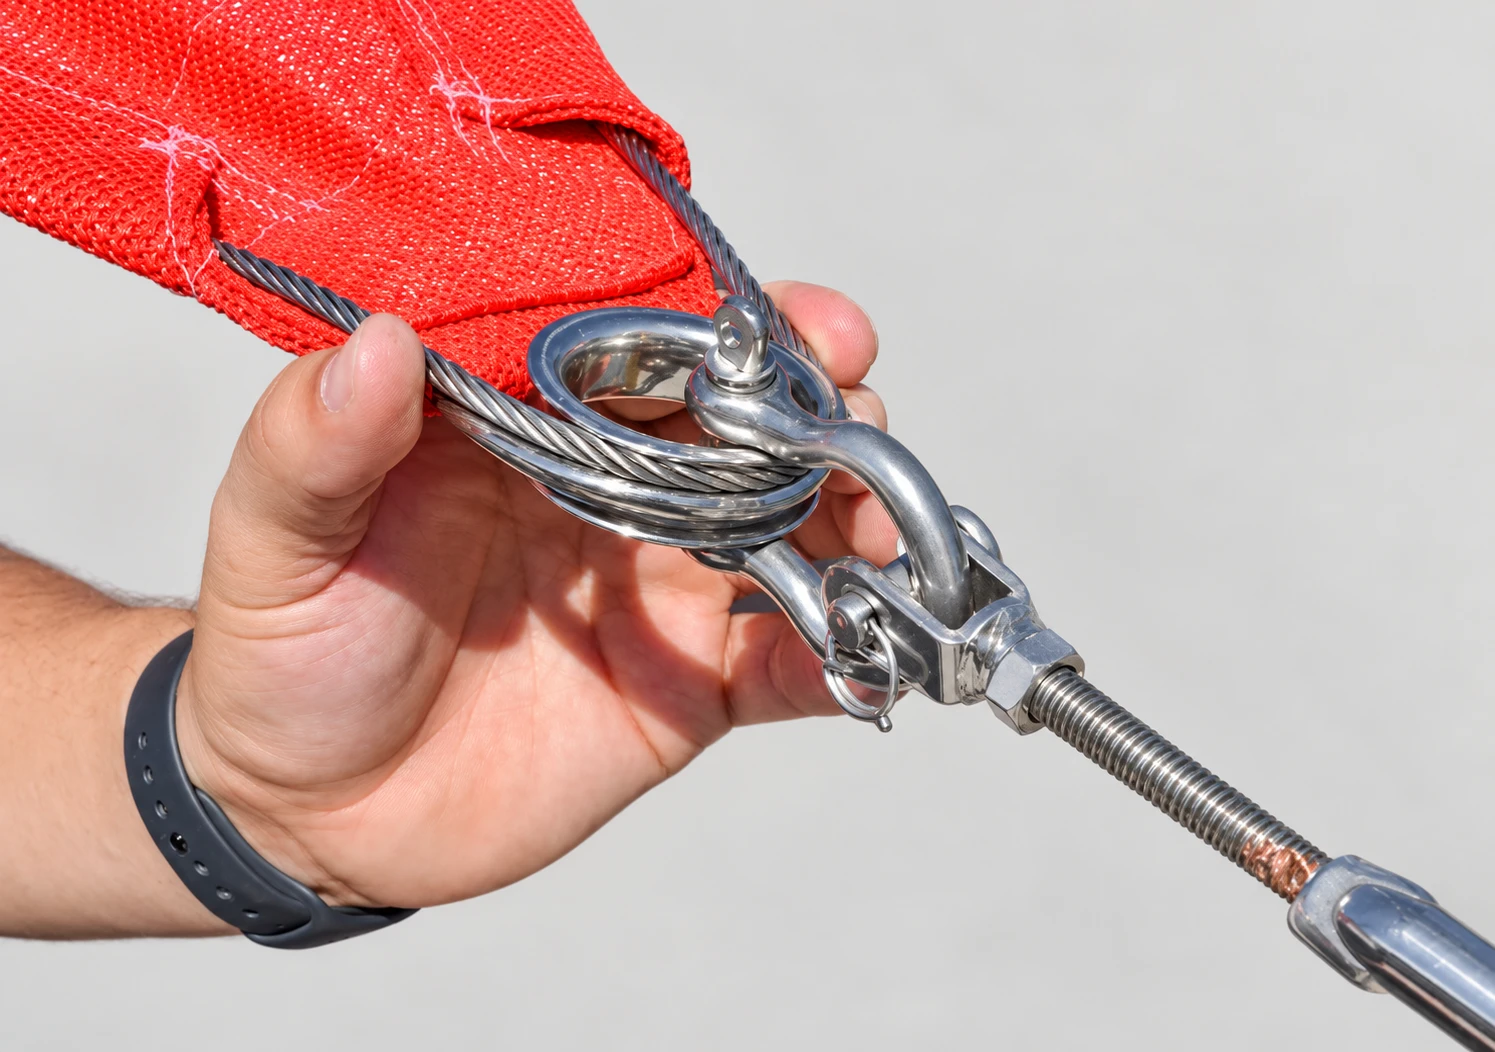
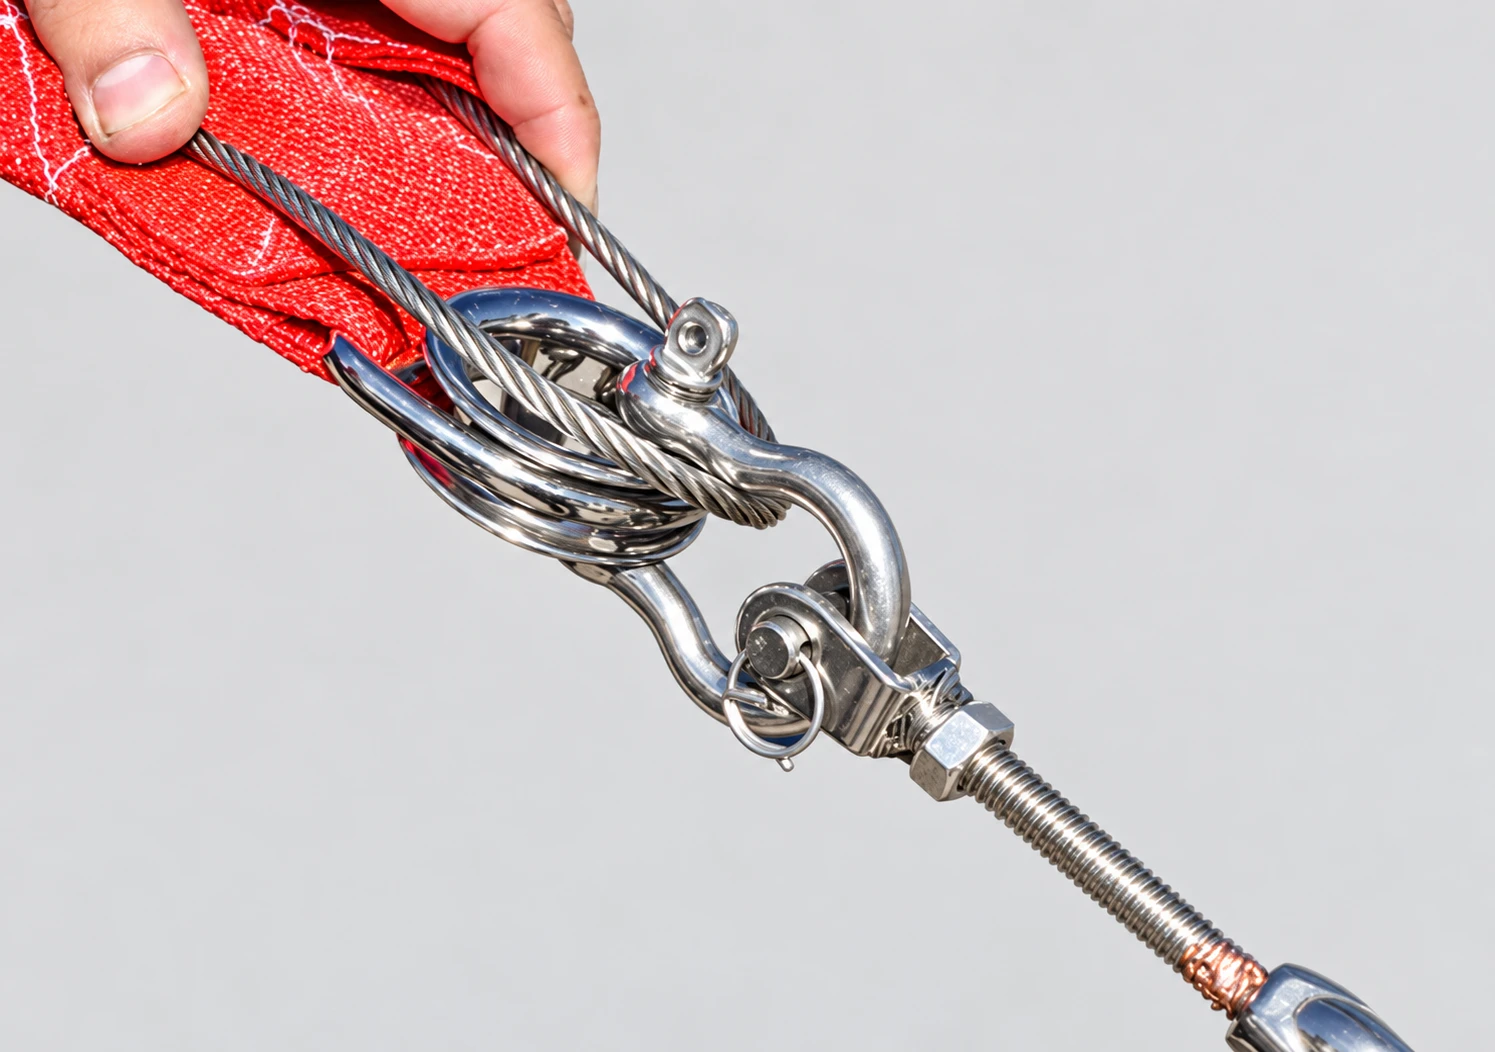
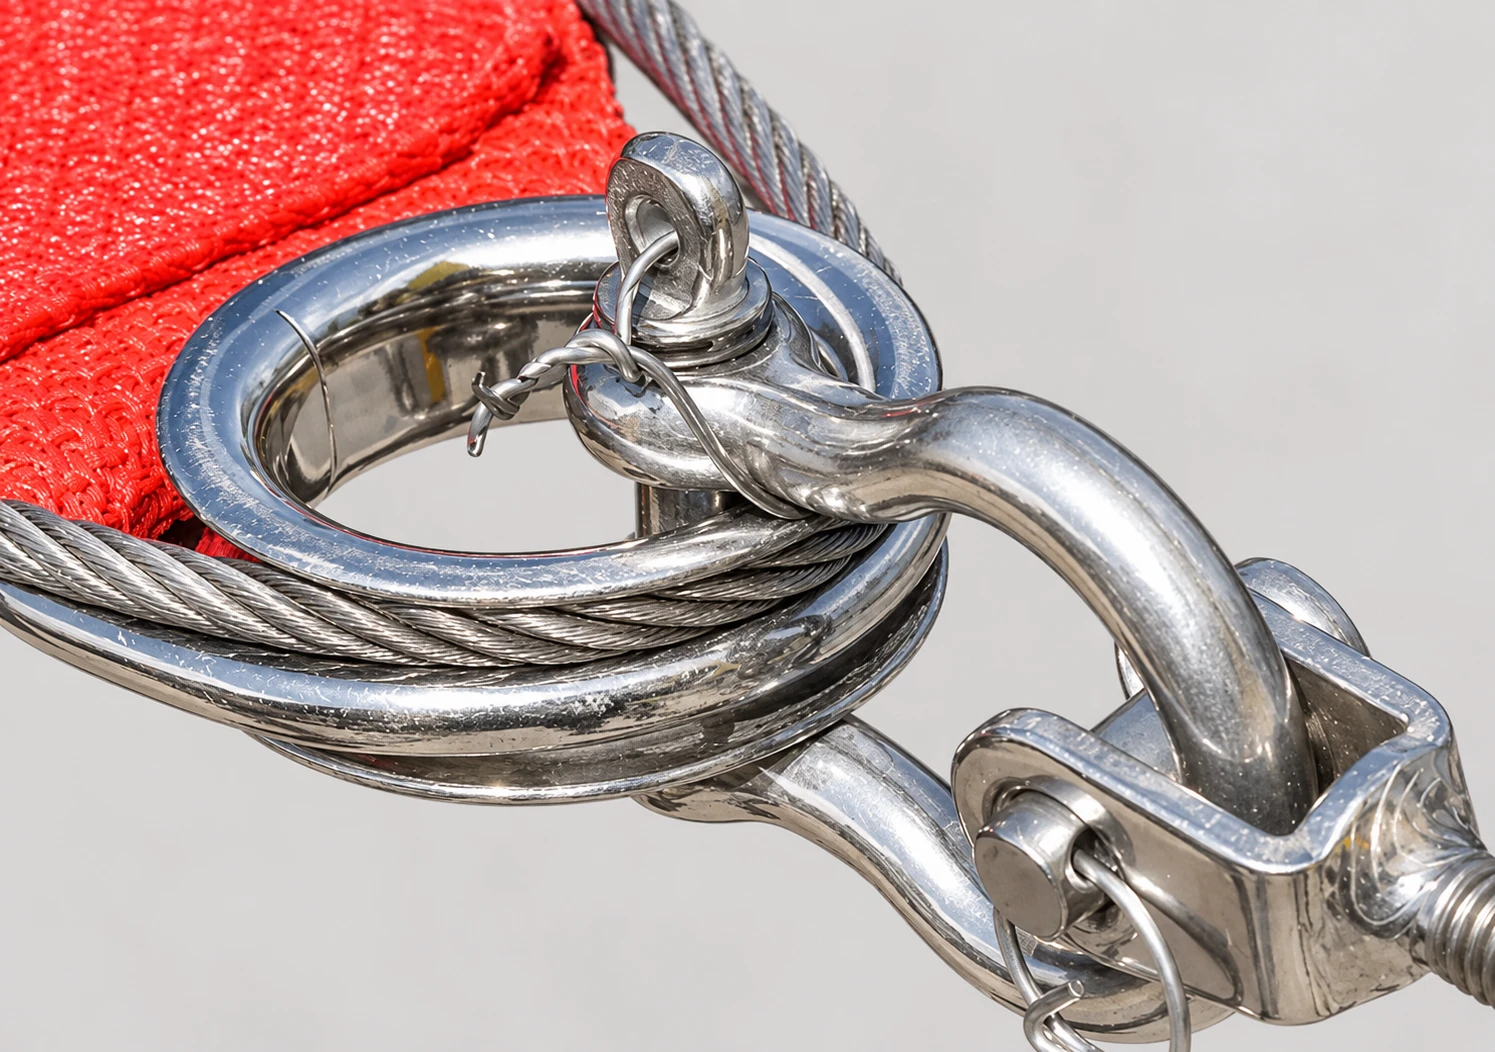
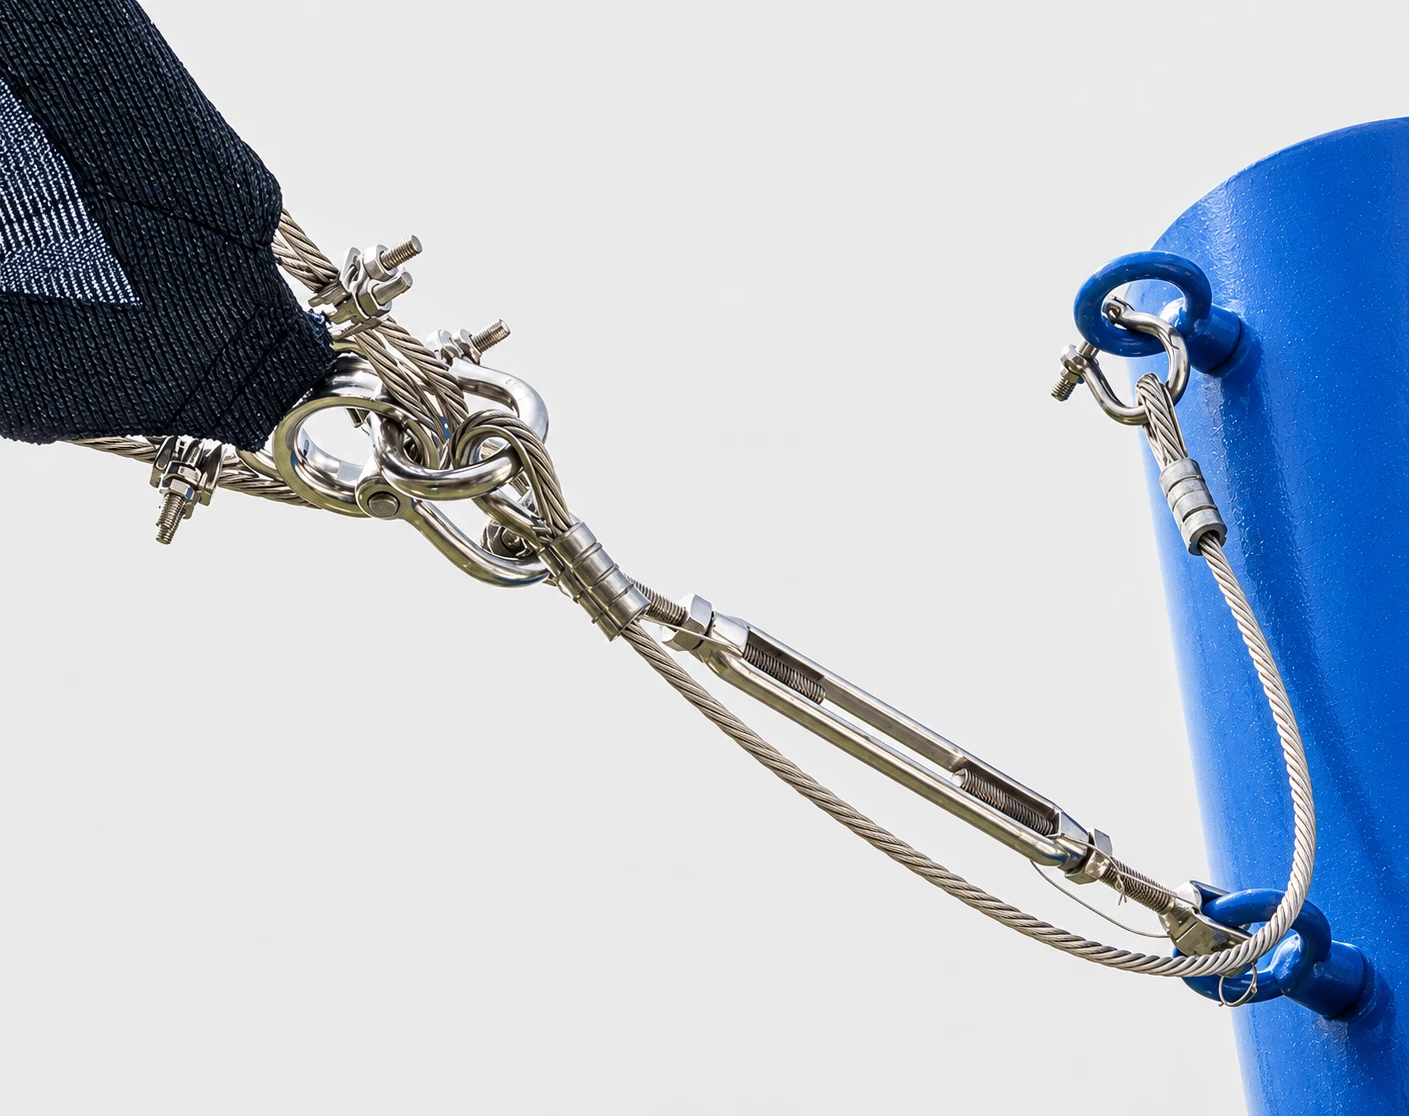
Start by attaching all of your corner hardware. Attach the corner D Rings to the Bow Shackle, making sure to capture both the D Ring and the Cable.
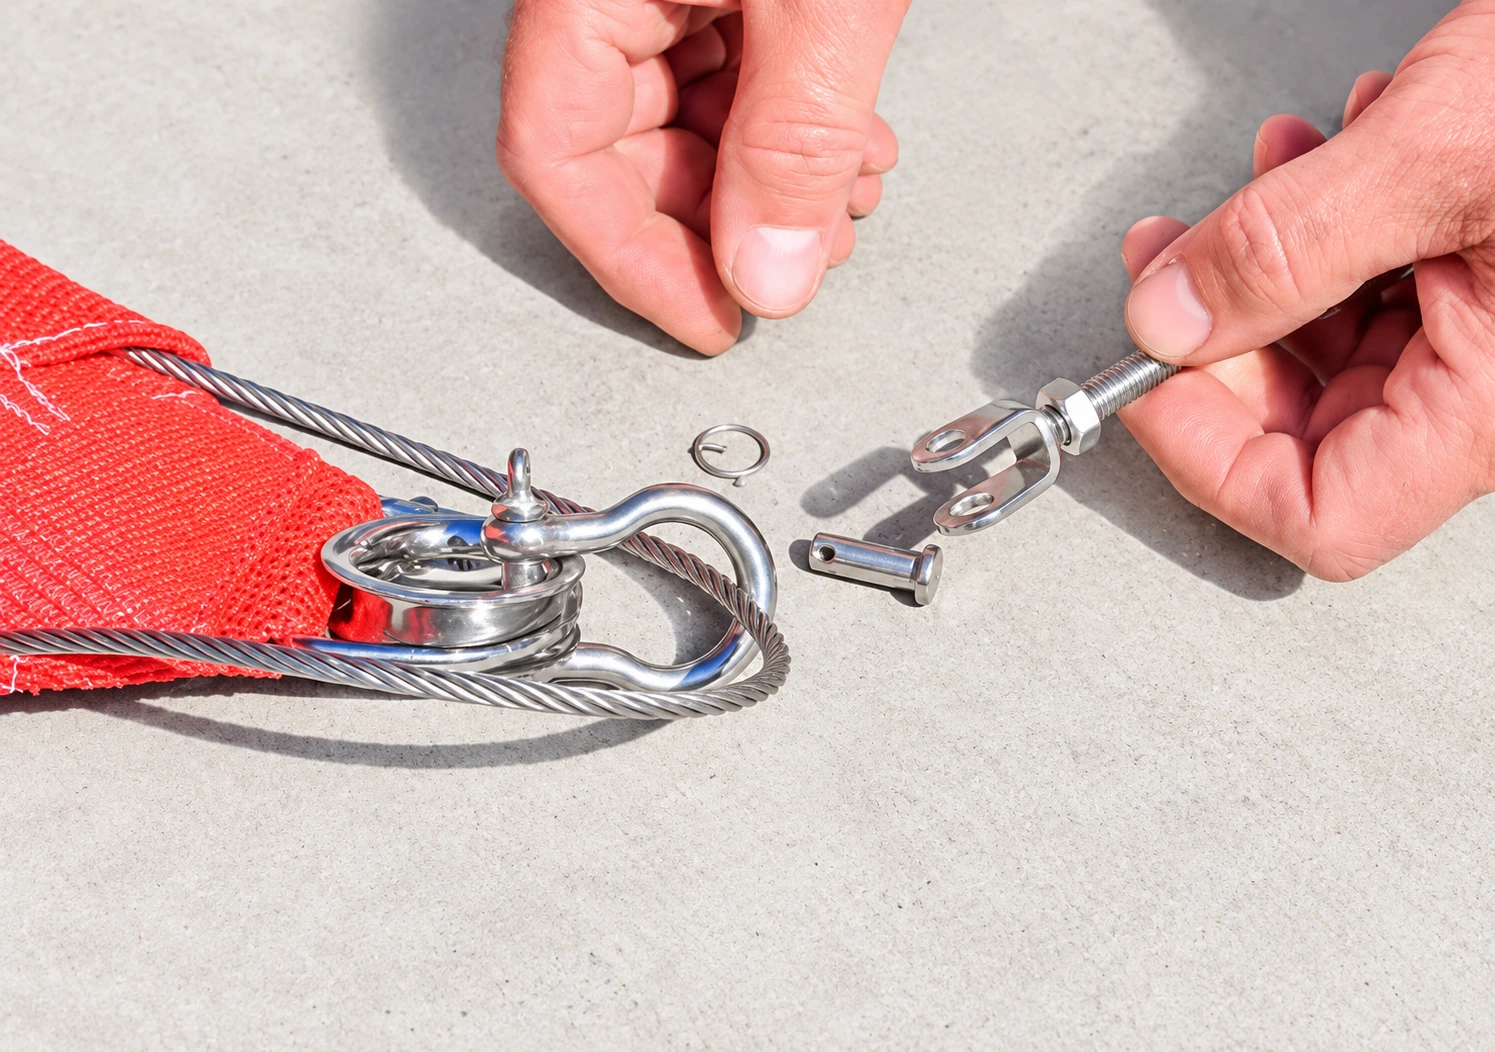
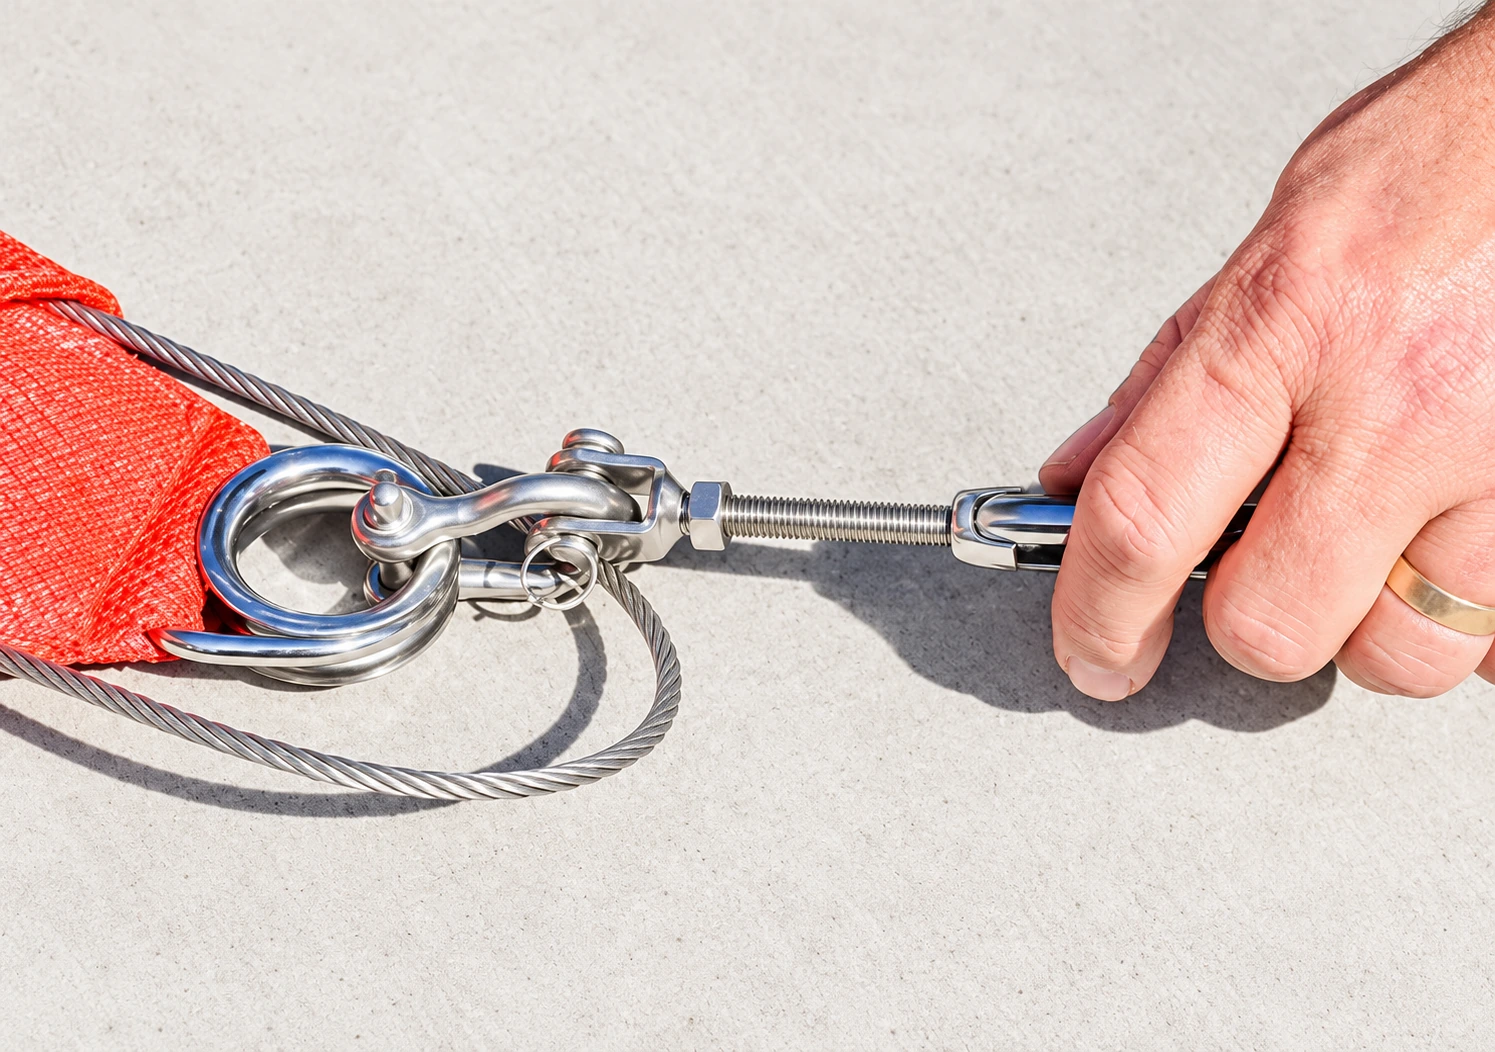
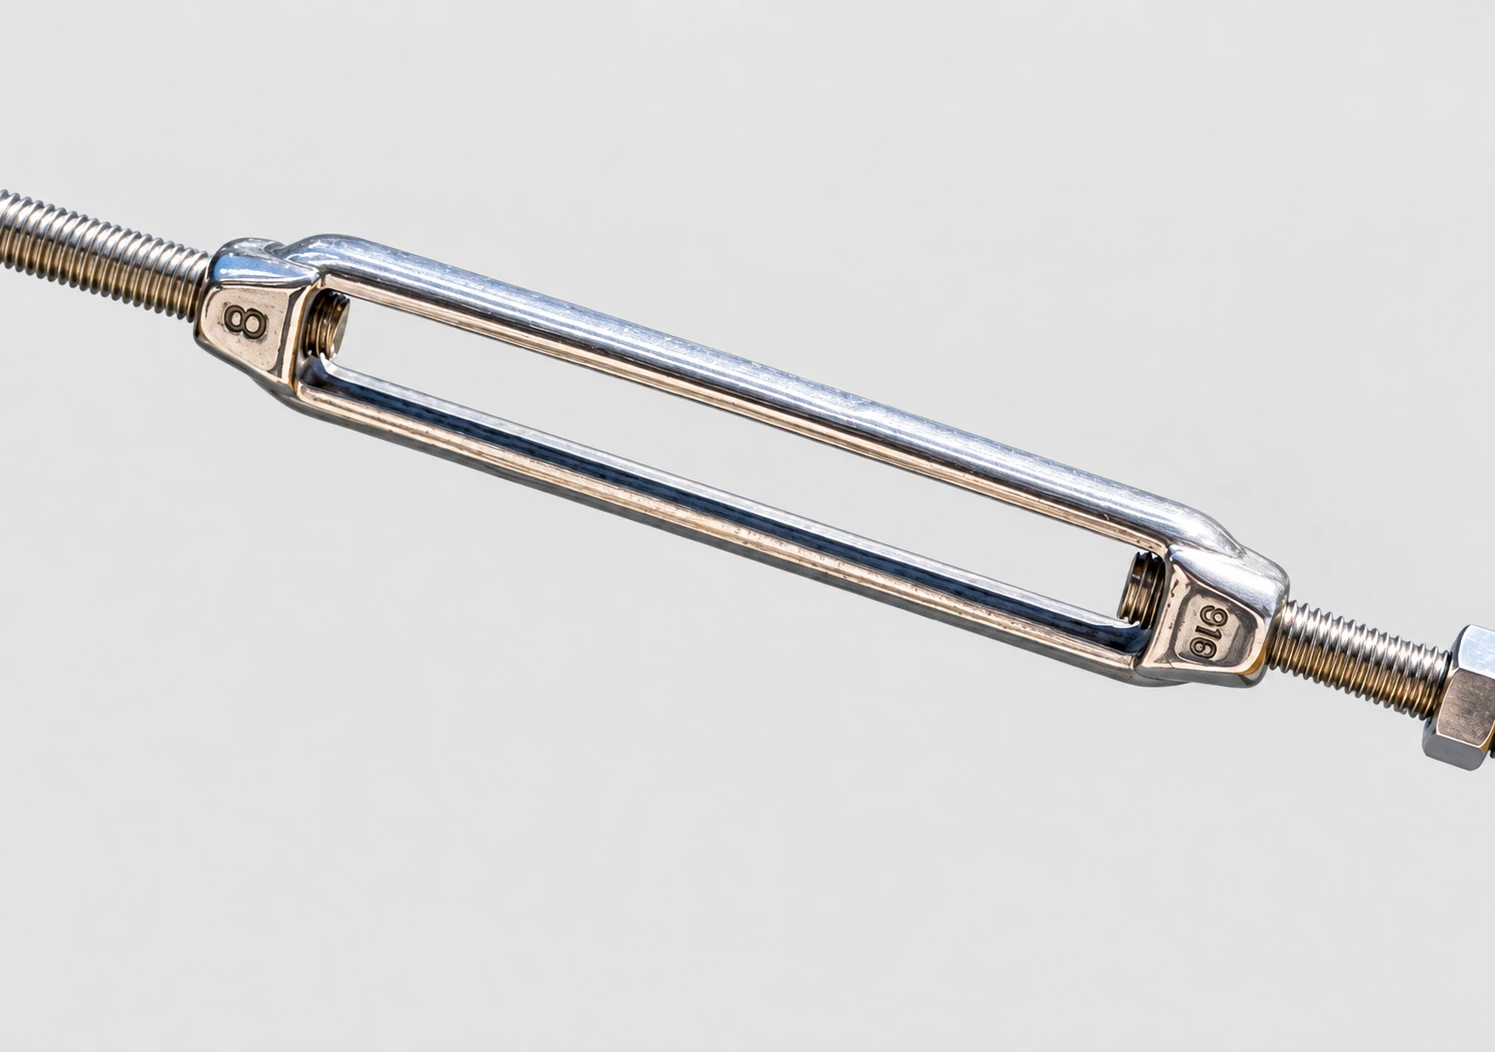
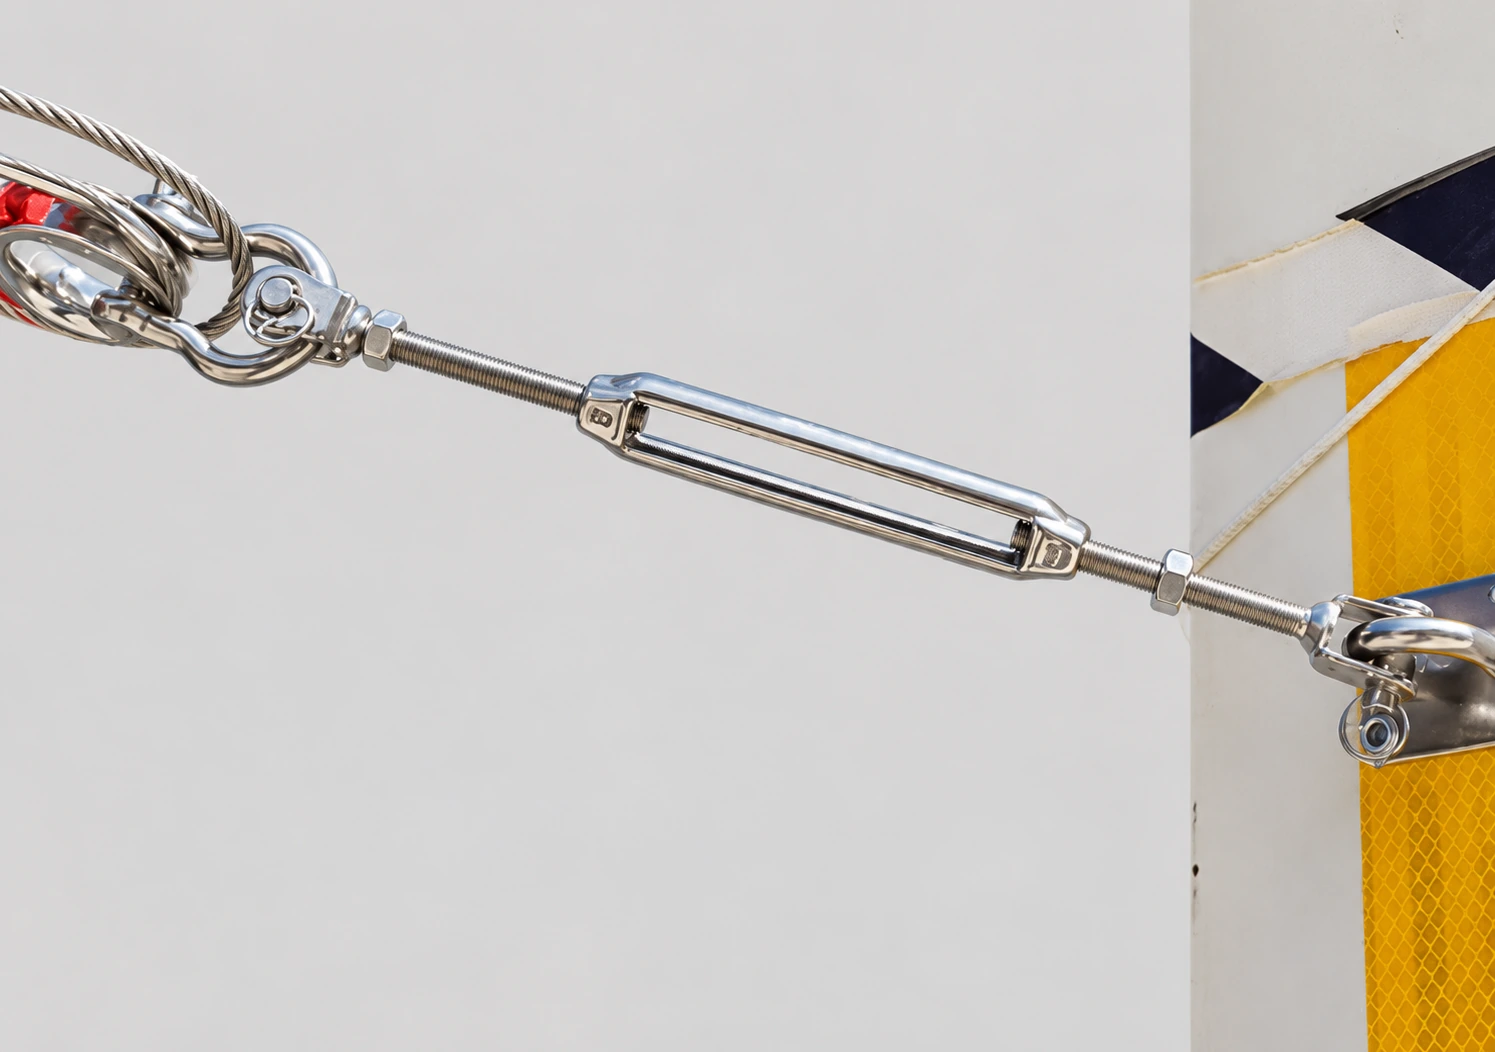
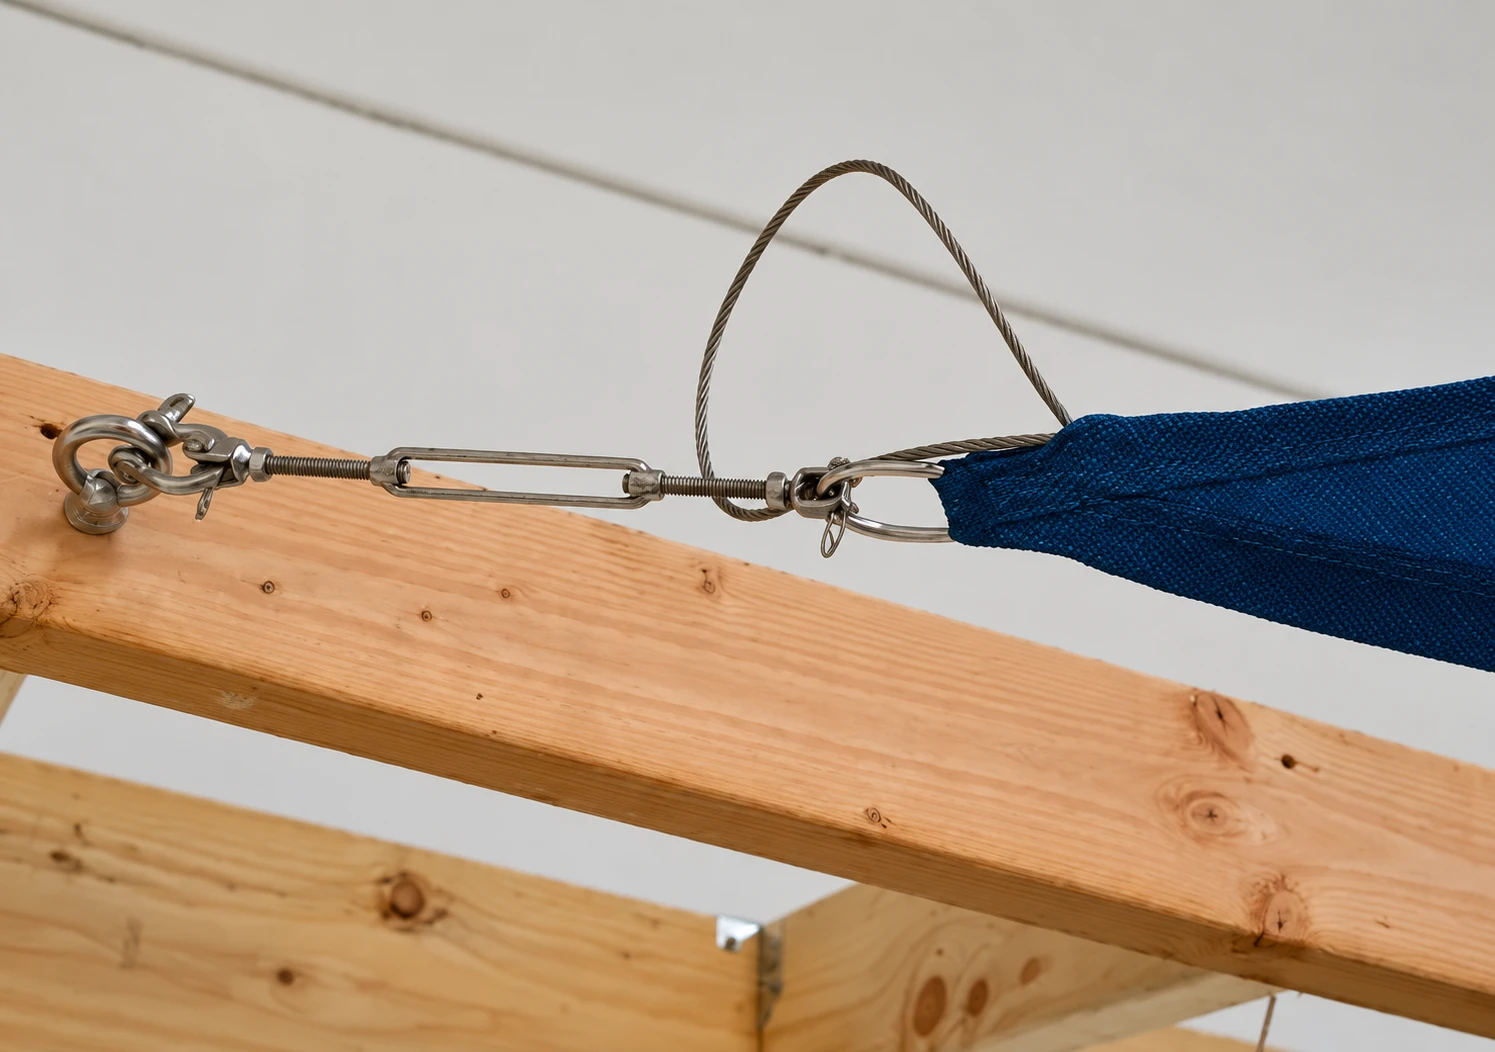
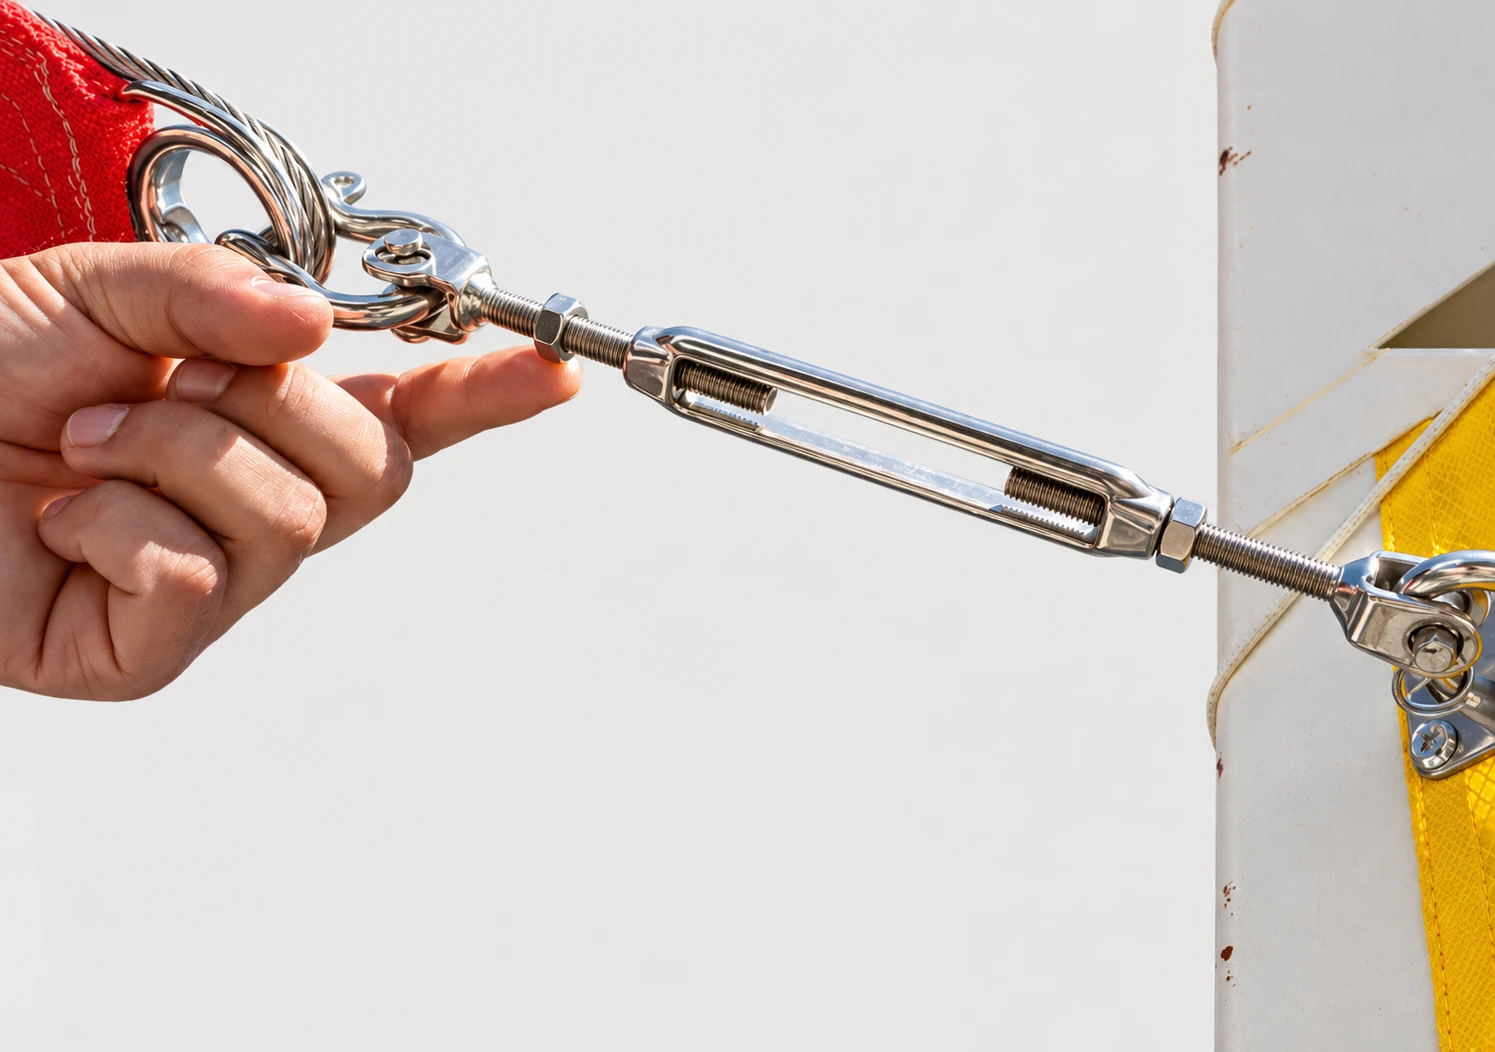
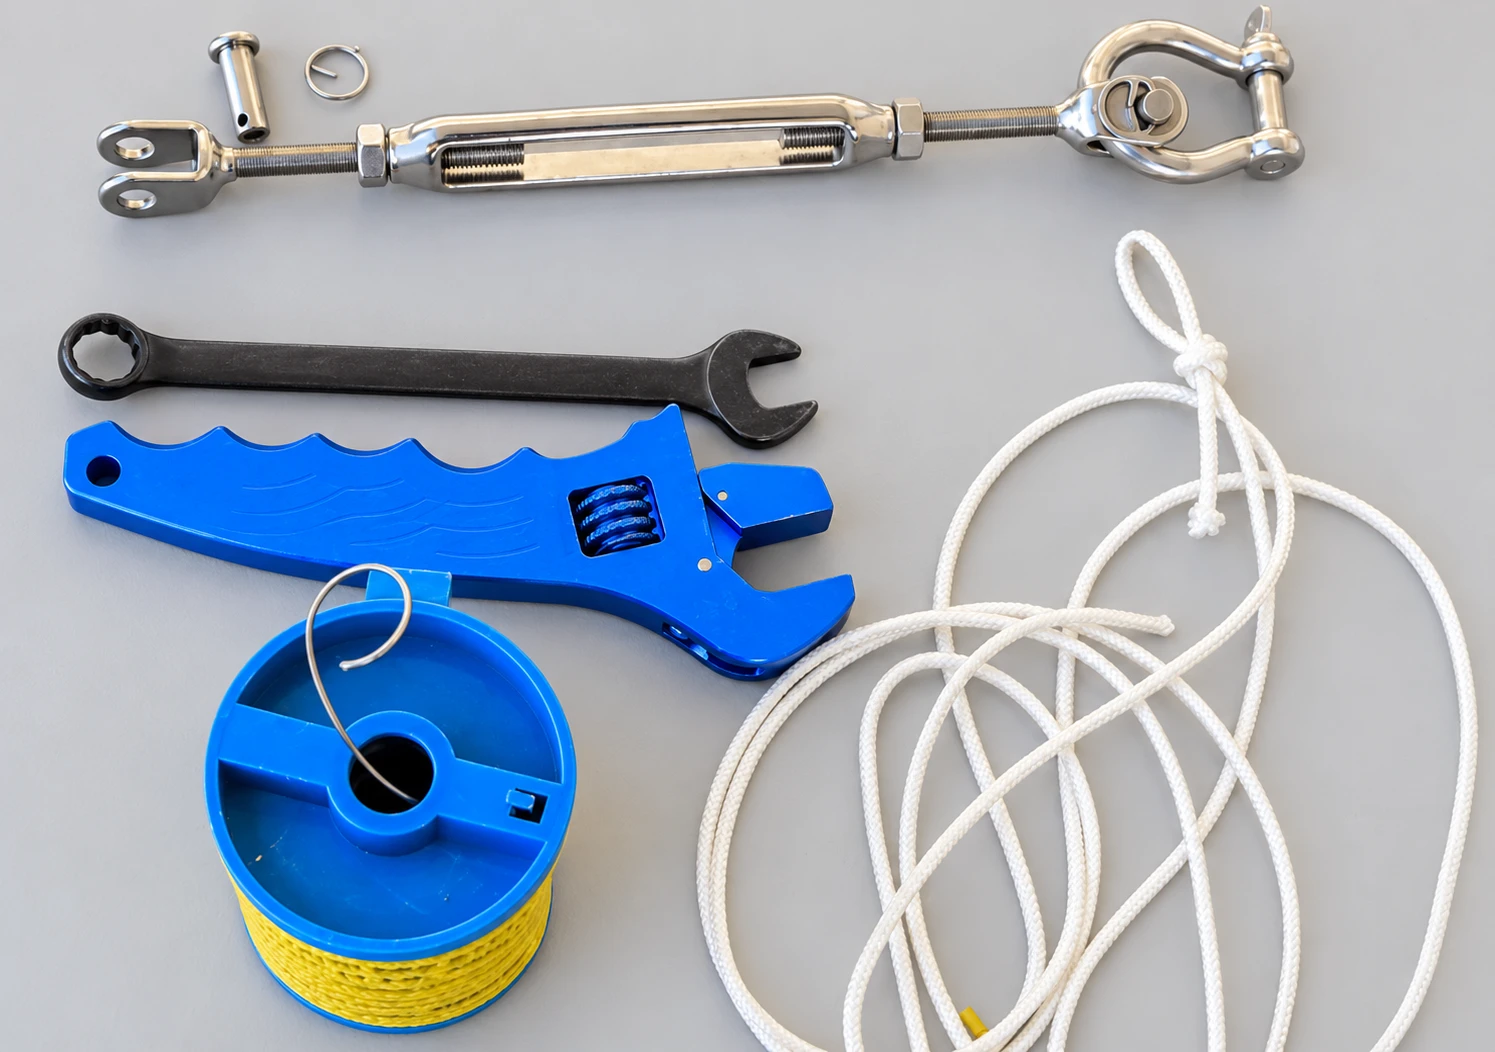
Next, attach your Turnbuckle to the Bow Shackle. Extend each turnbuckle only within the manufacturer’s specified adjustment range, retaining the required thread engagement at both ends.
We recommend that you use a Turnbuckle and Bow Shackle at each corner for maximum flexibility during the initial installation.
Step 2: Attach the Corners
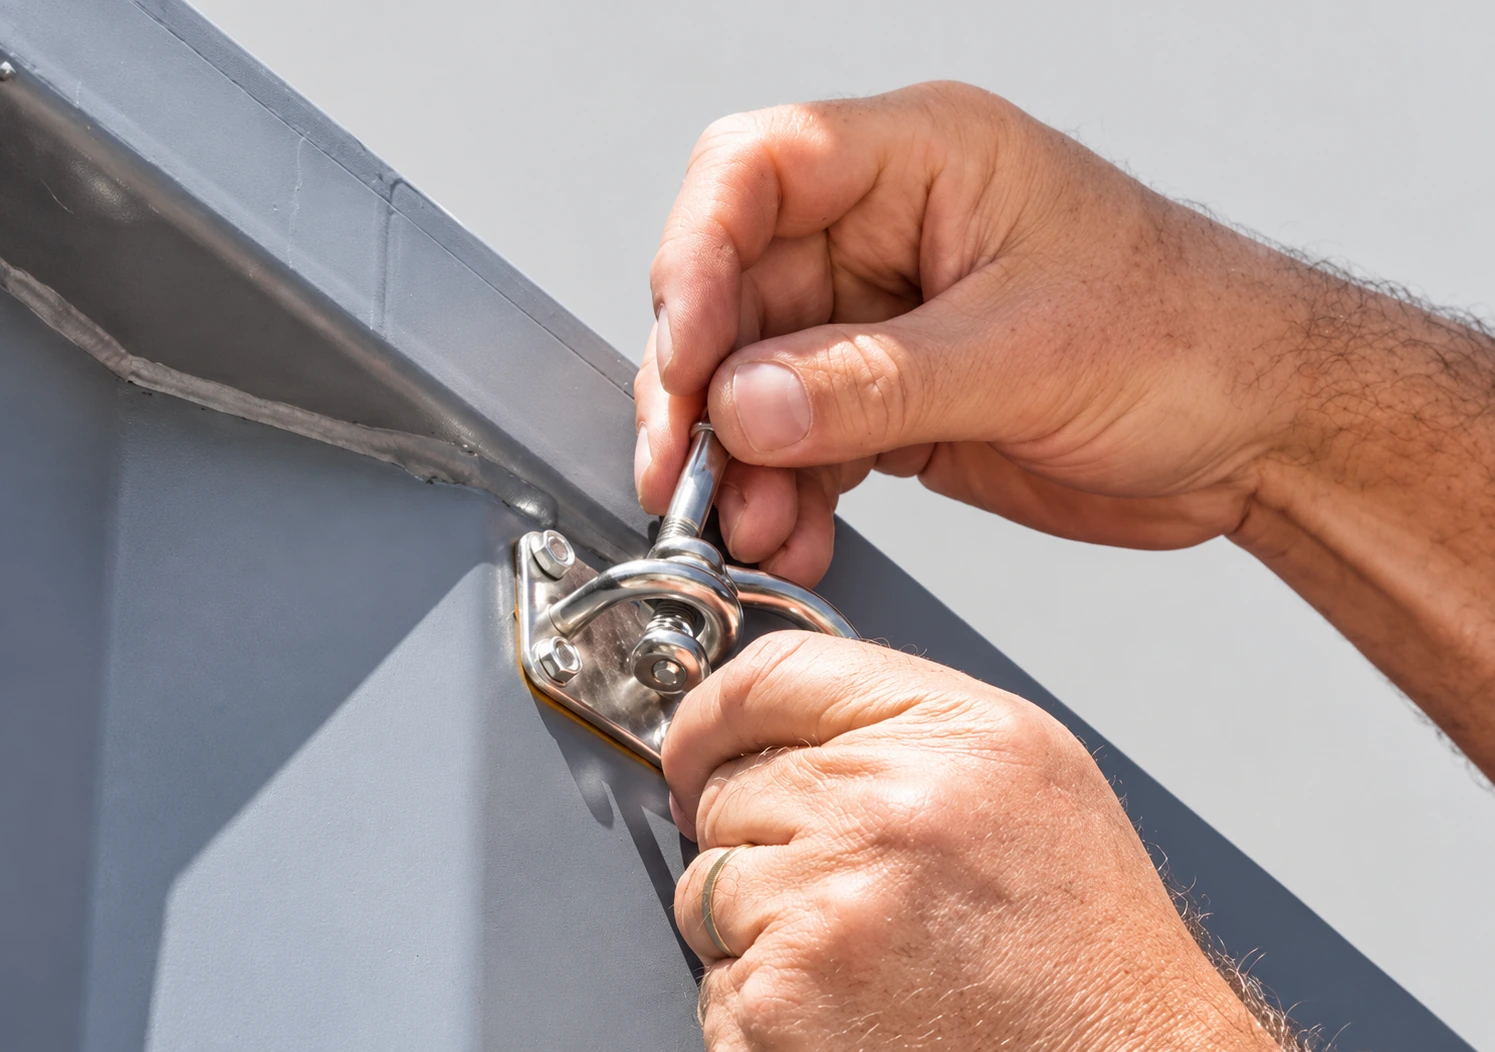
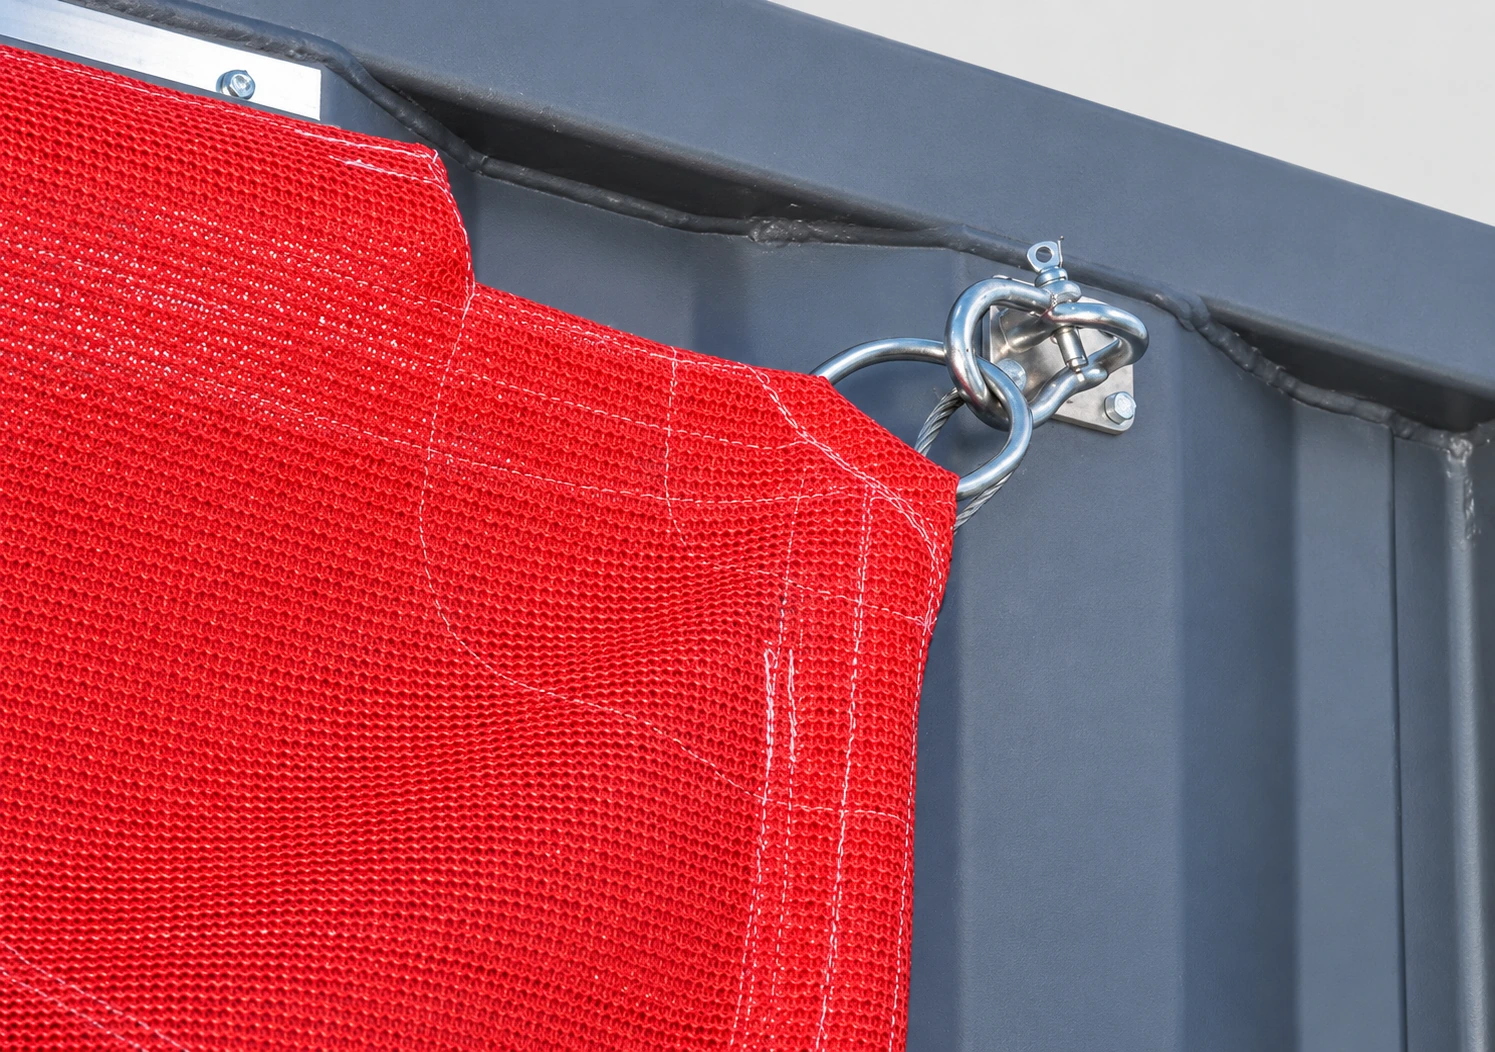
If you have any Direct Connection points, you will attach the Bow Shackle directly to the attachment point.
Turnbuckles can be directly connected to your attachment point. If you are having trouble reaching the point or the Turnbuckle doesn’t fit around the attachment loop, it can be connected via an extra Bow Shackle.
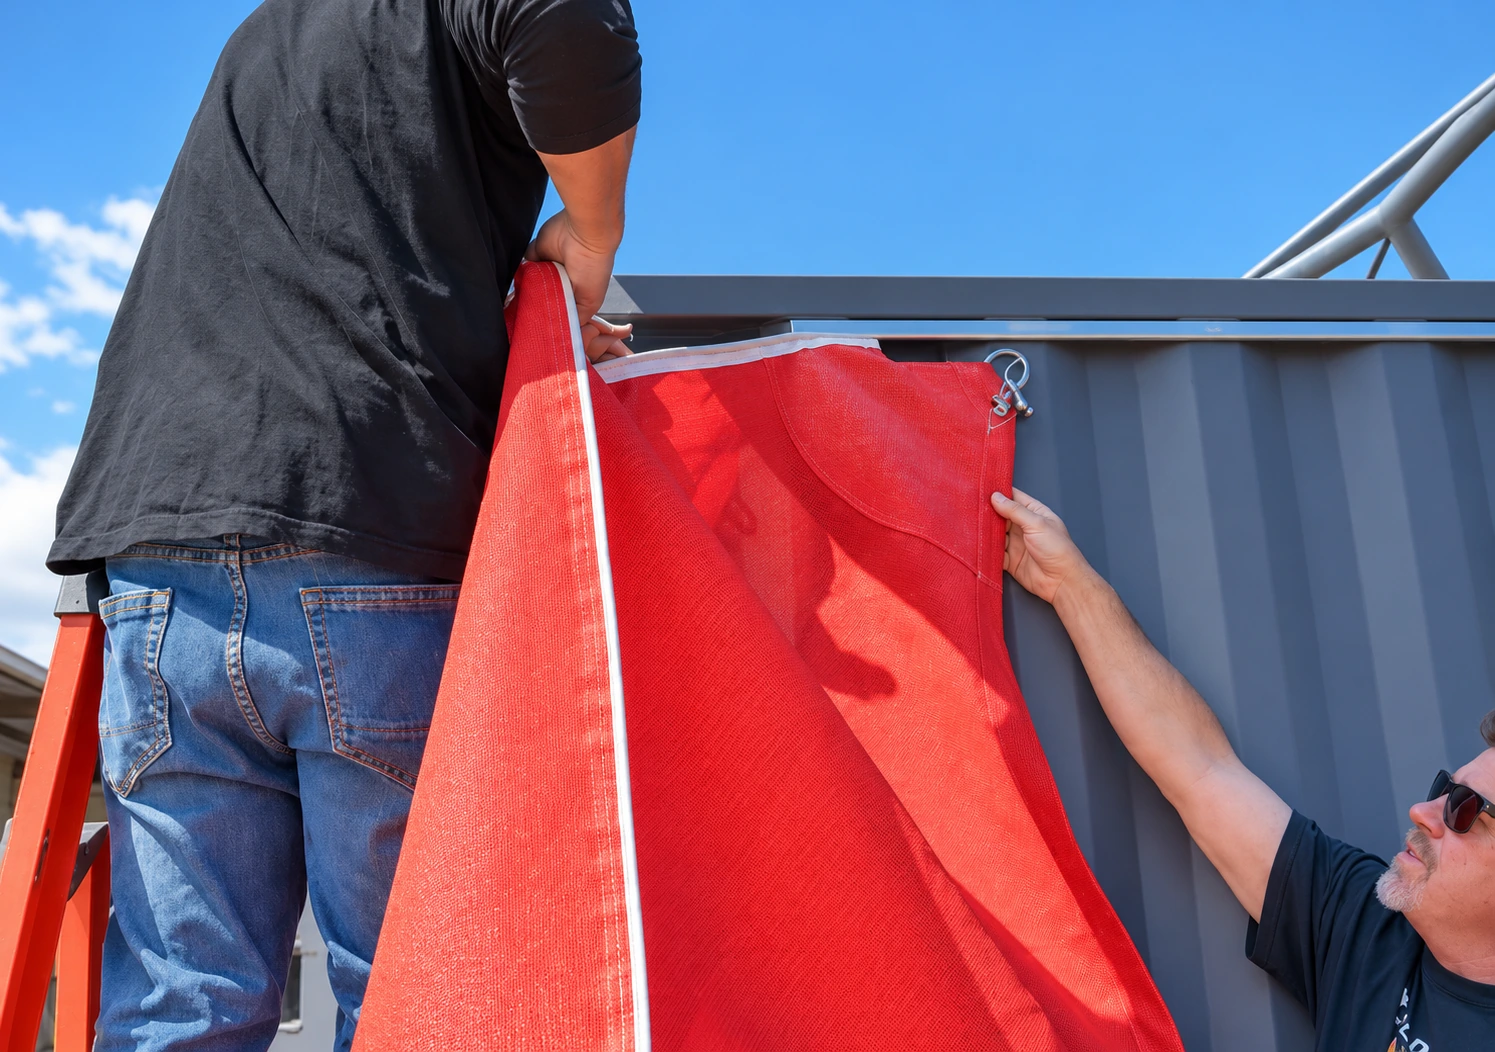
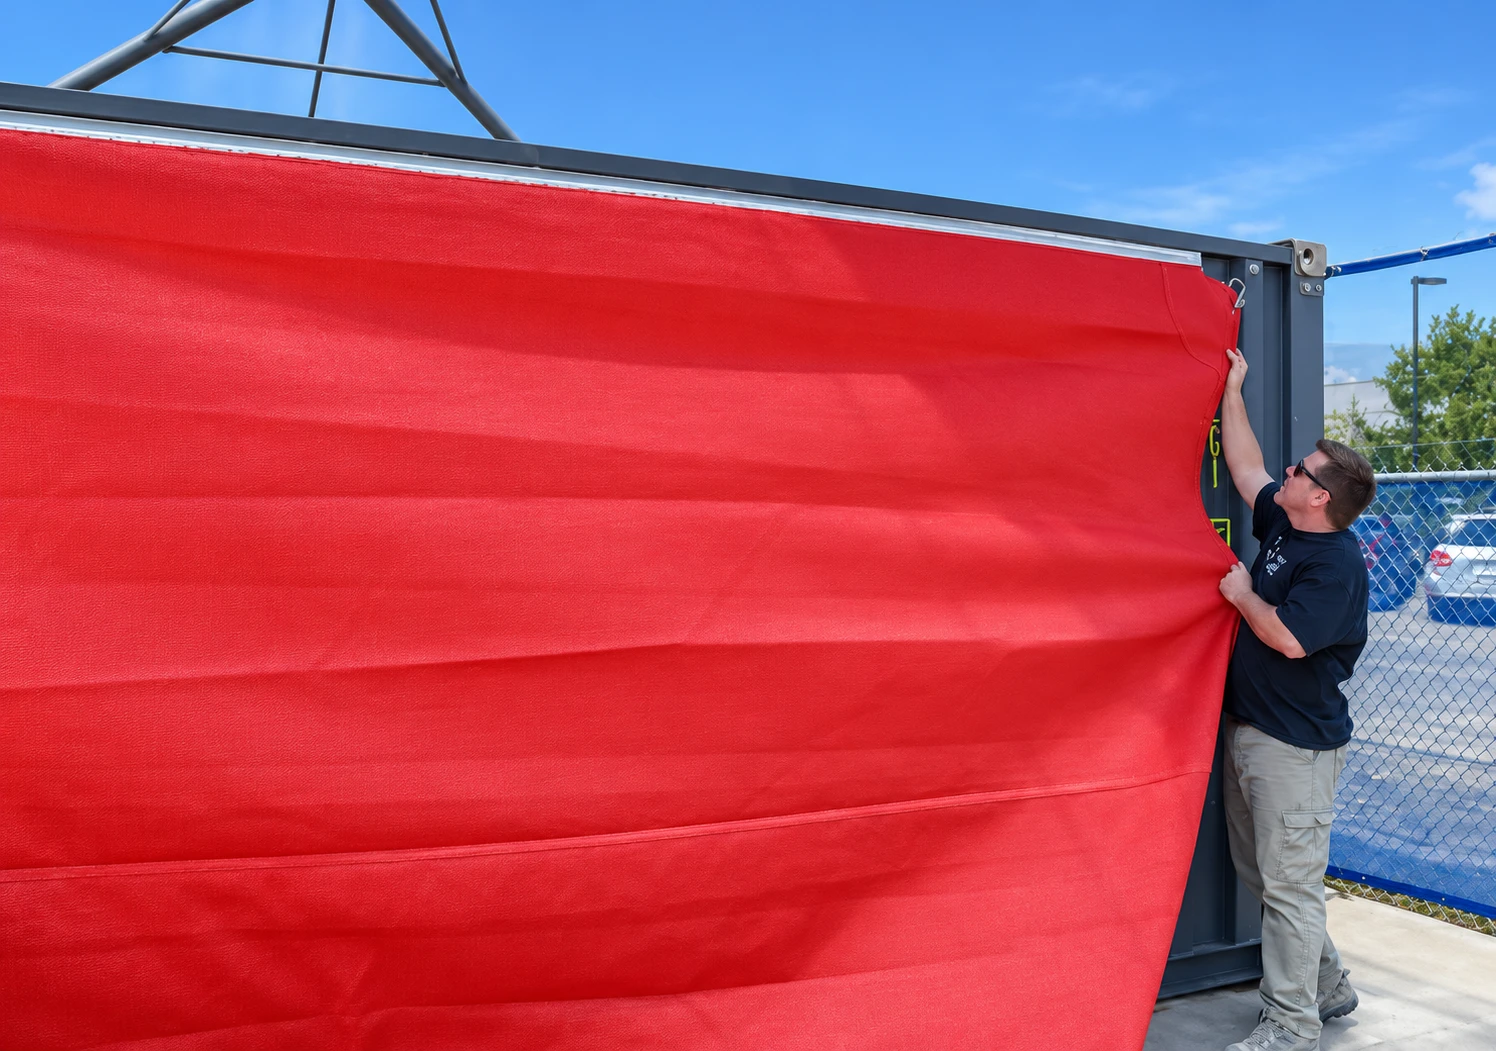
If you are installing a Keder or A-Rail sail, you should install the Keder side first, followed by the corners at either side of the Keder. Then you will attach the remaining corners just like you would any other sail
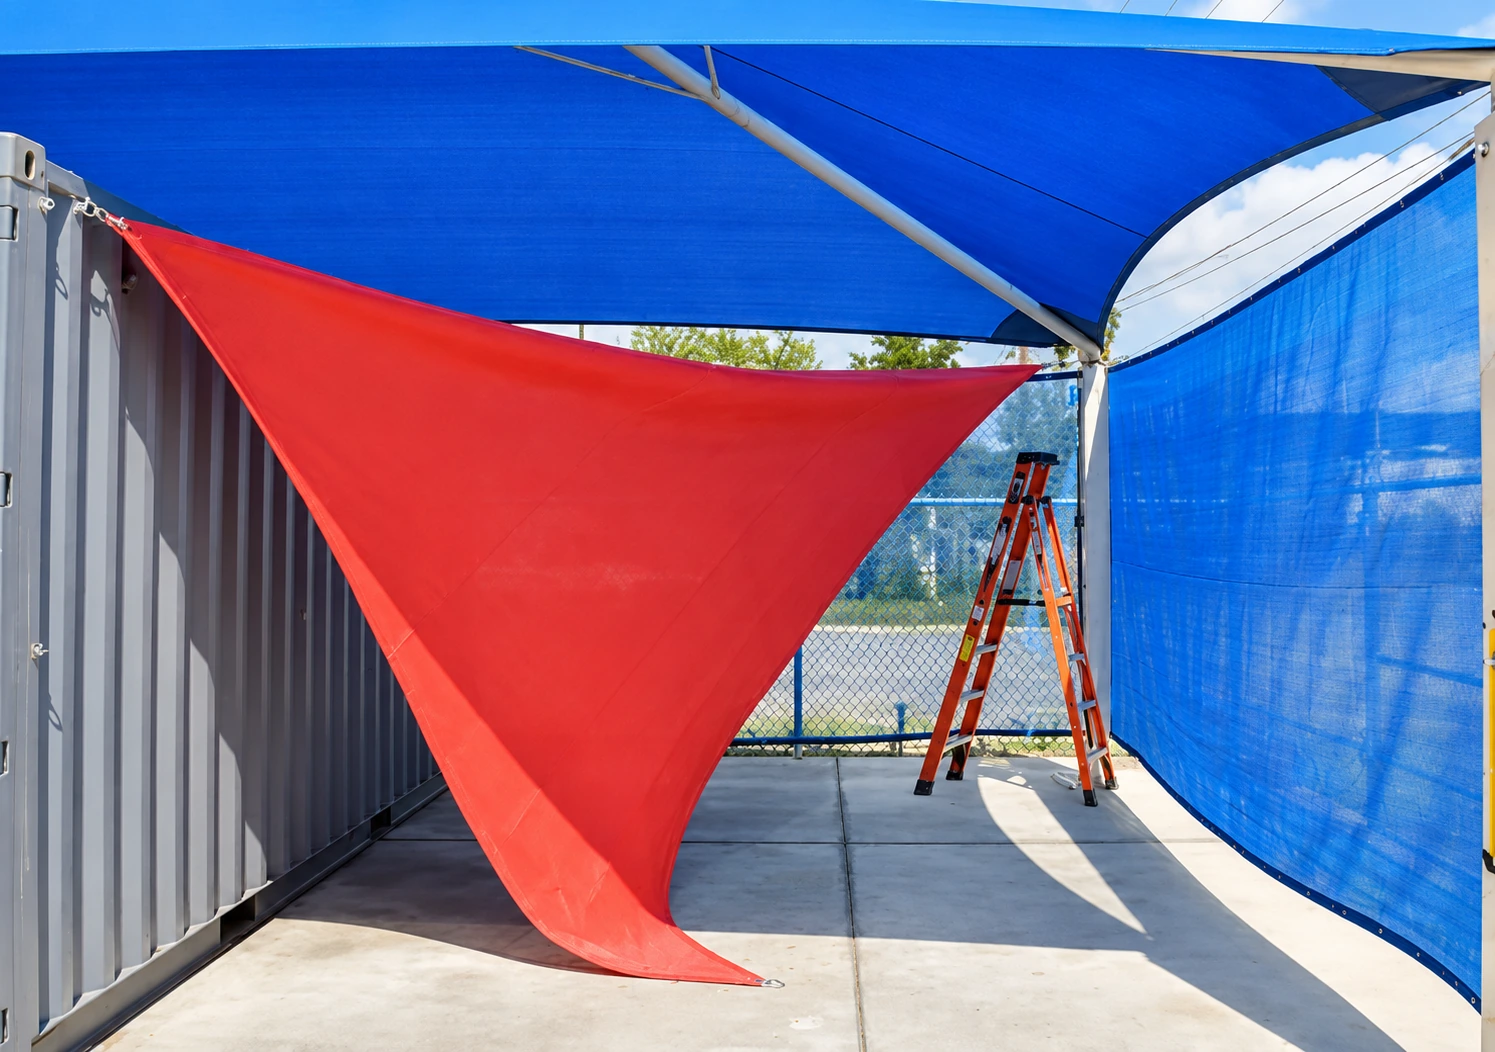
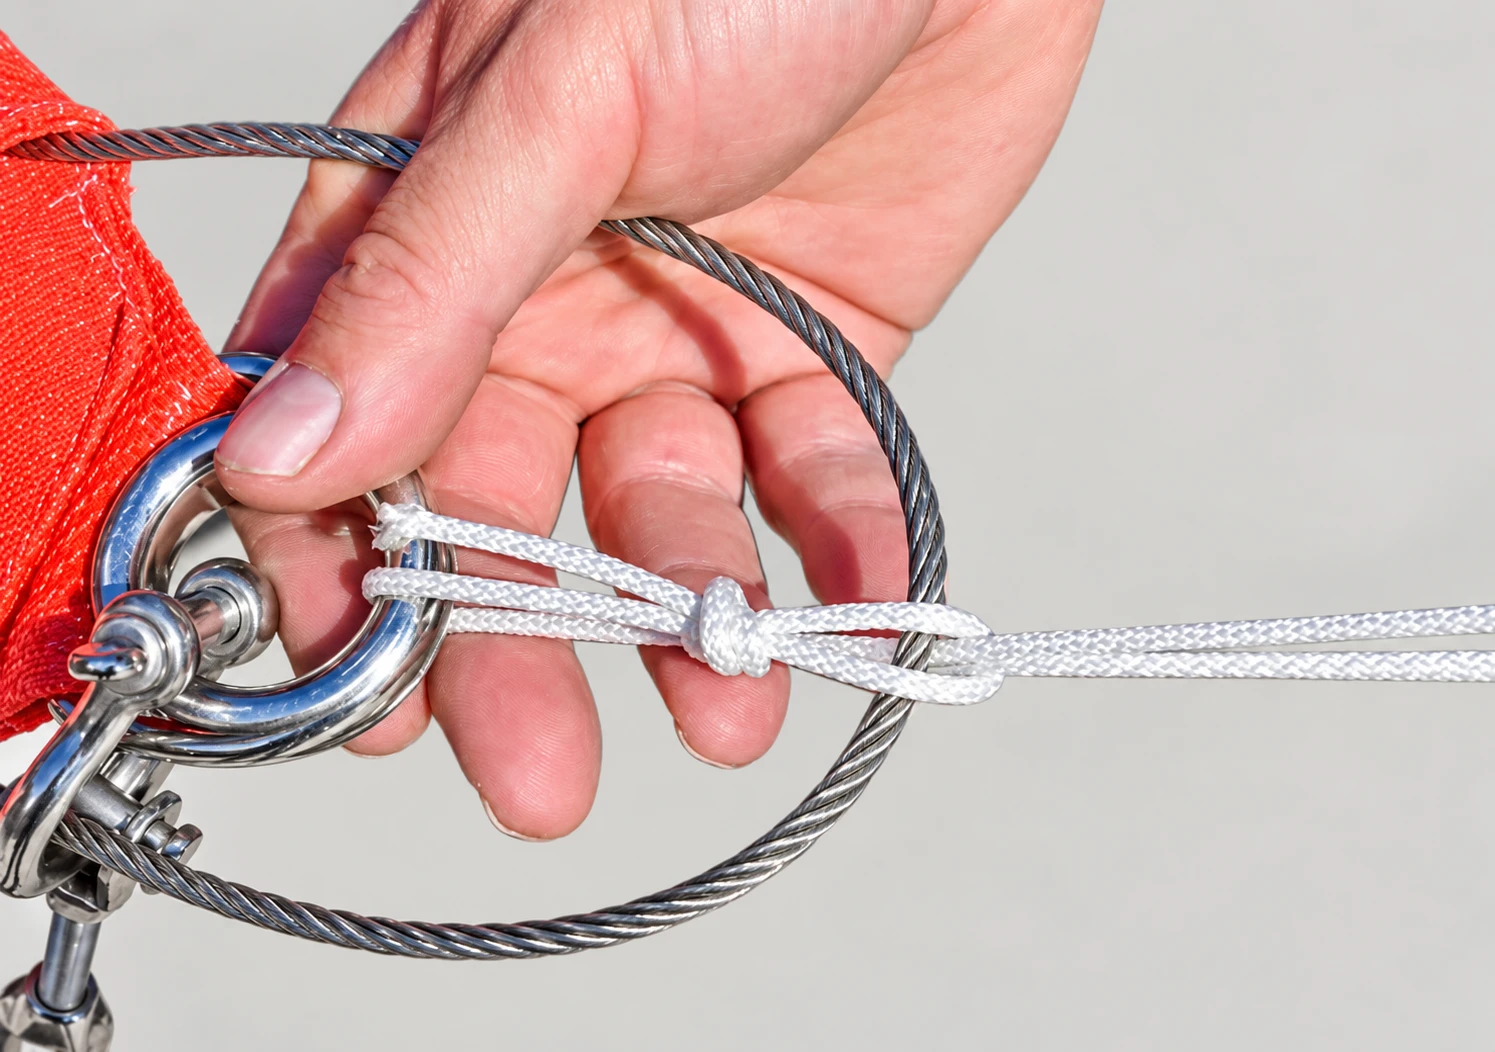
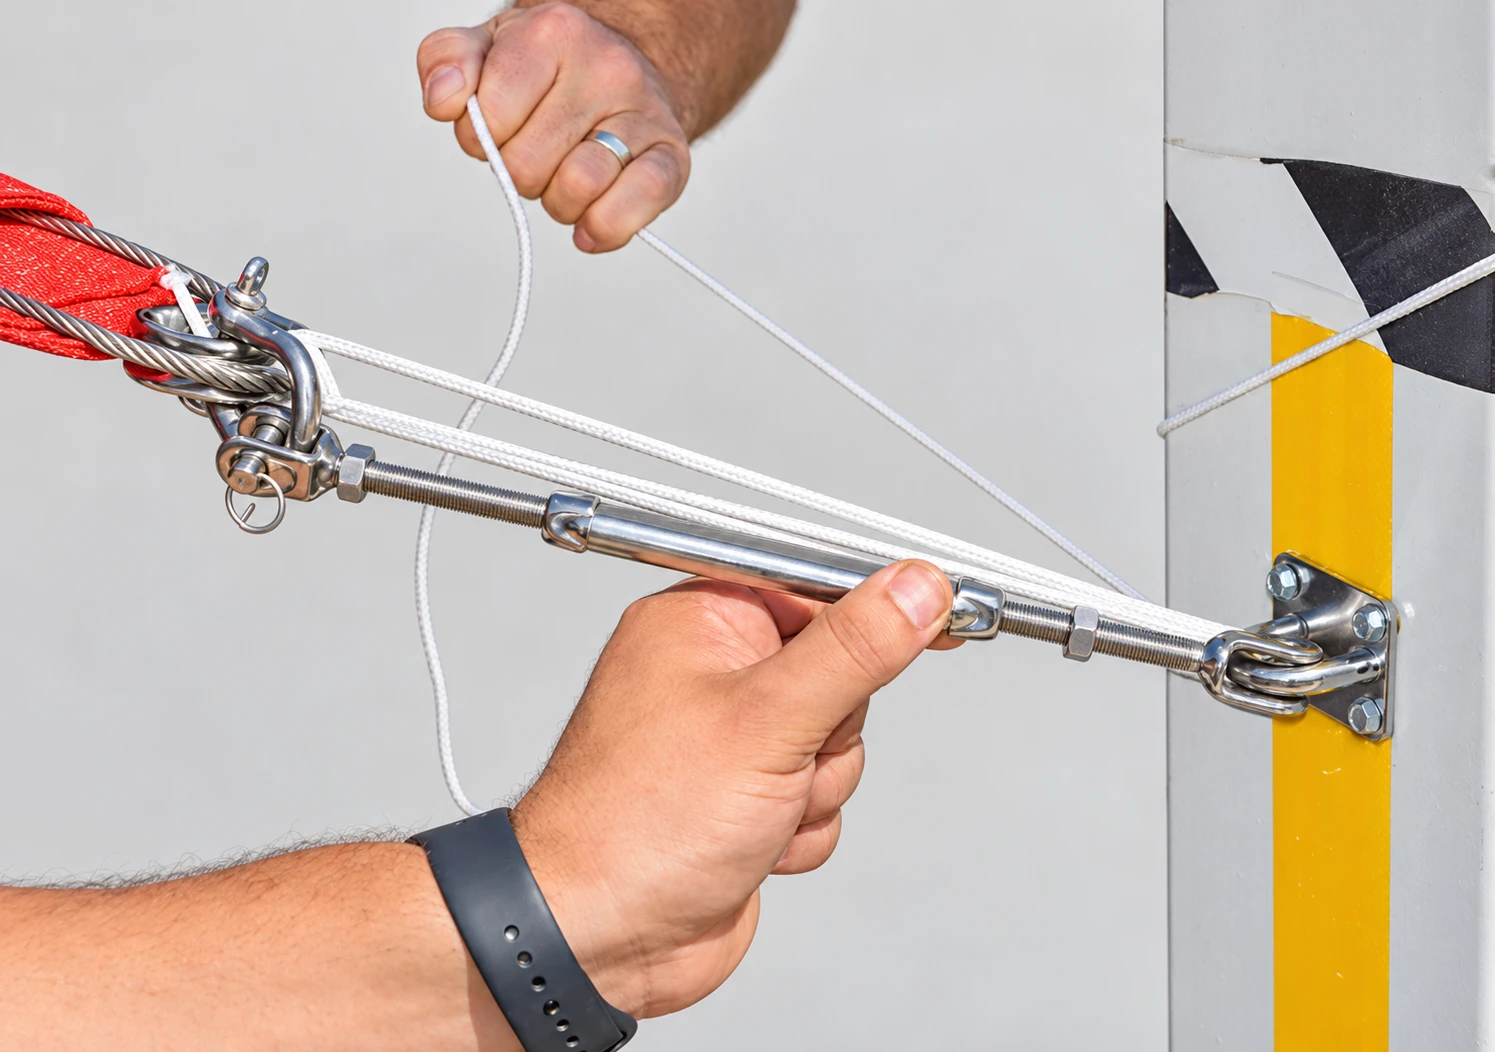
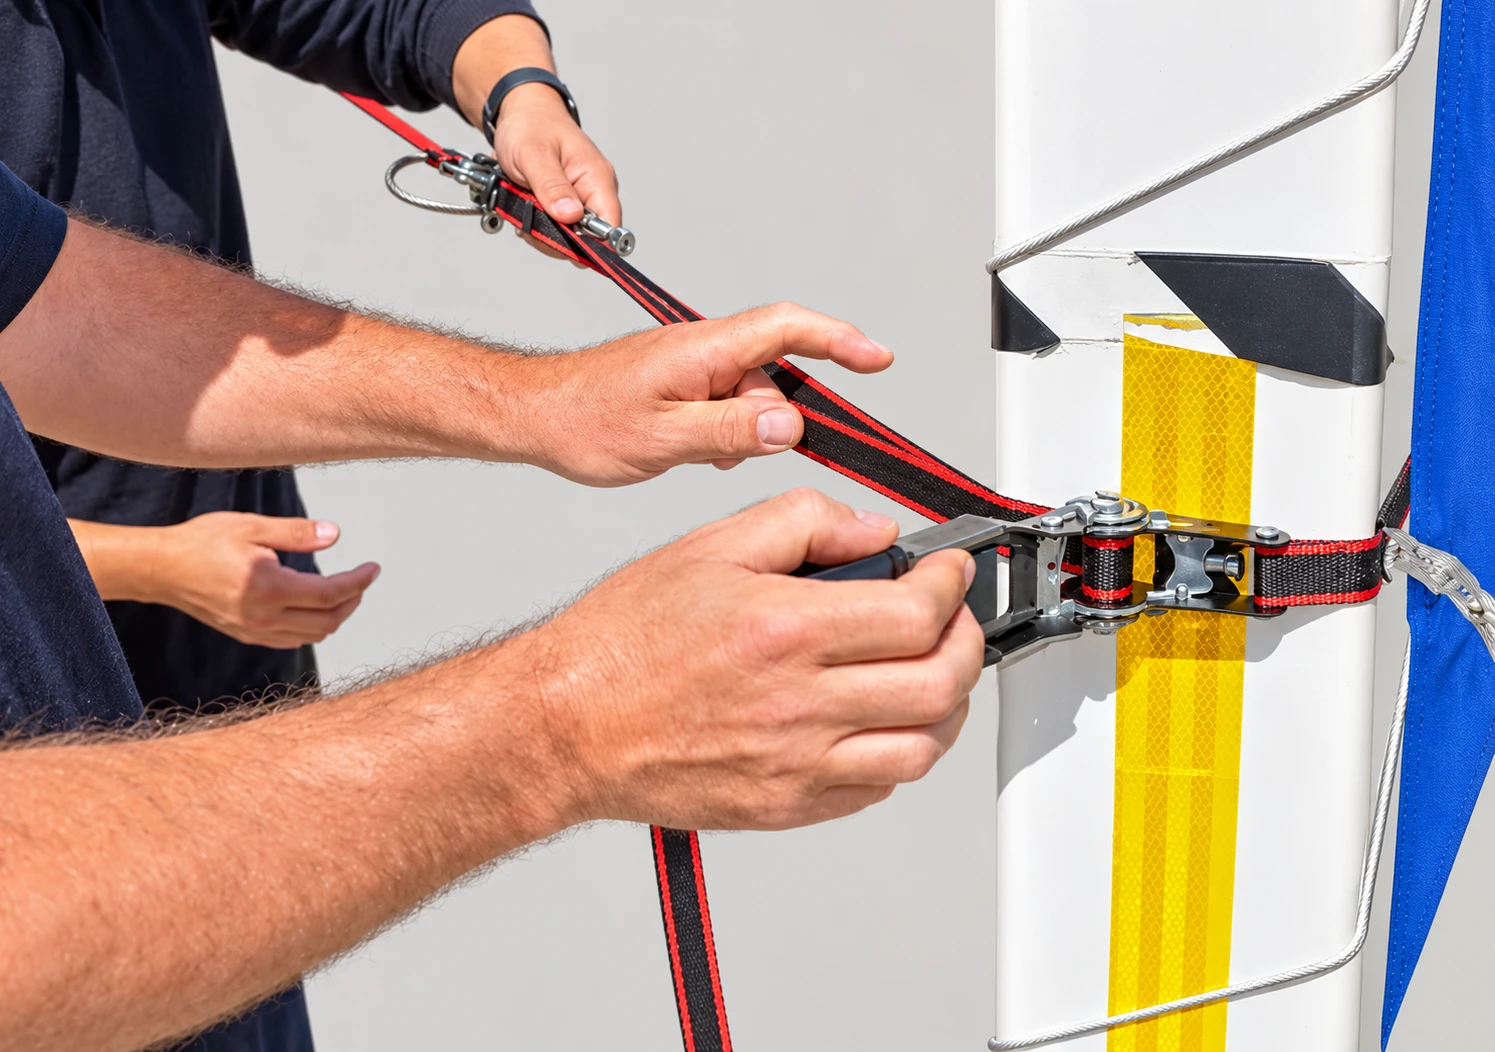
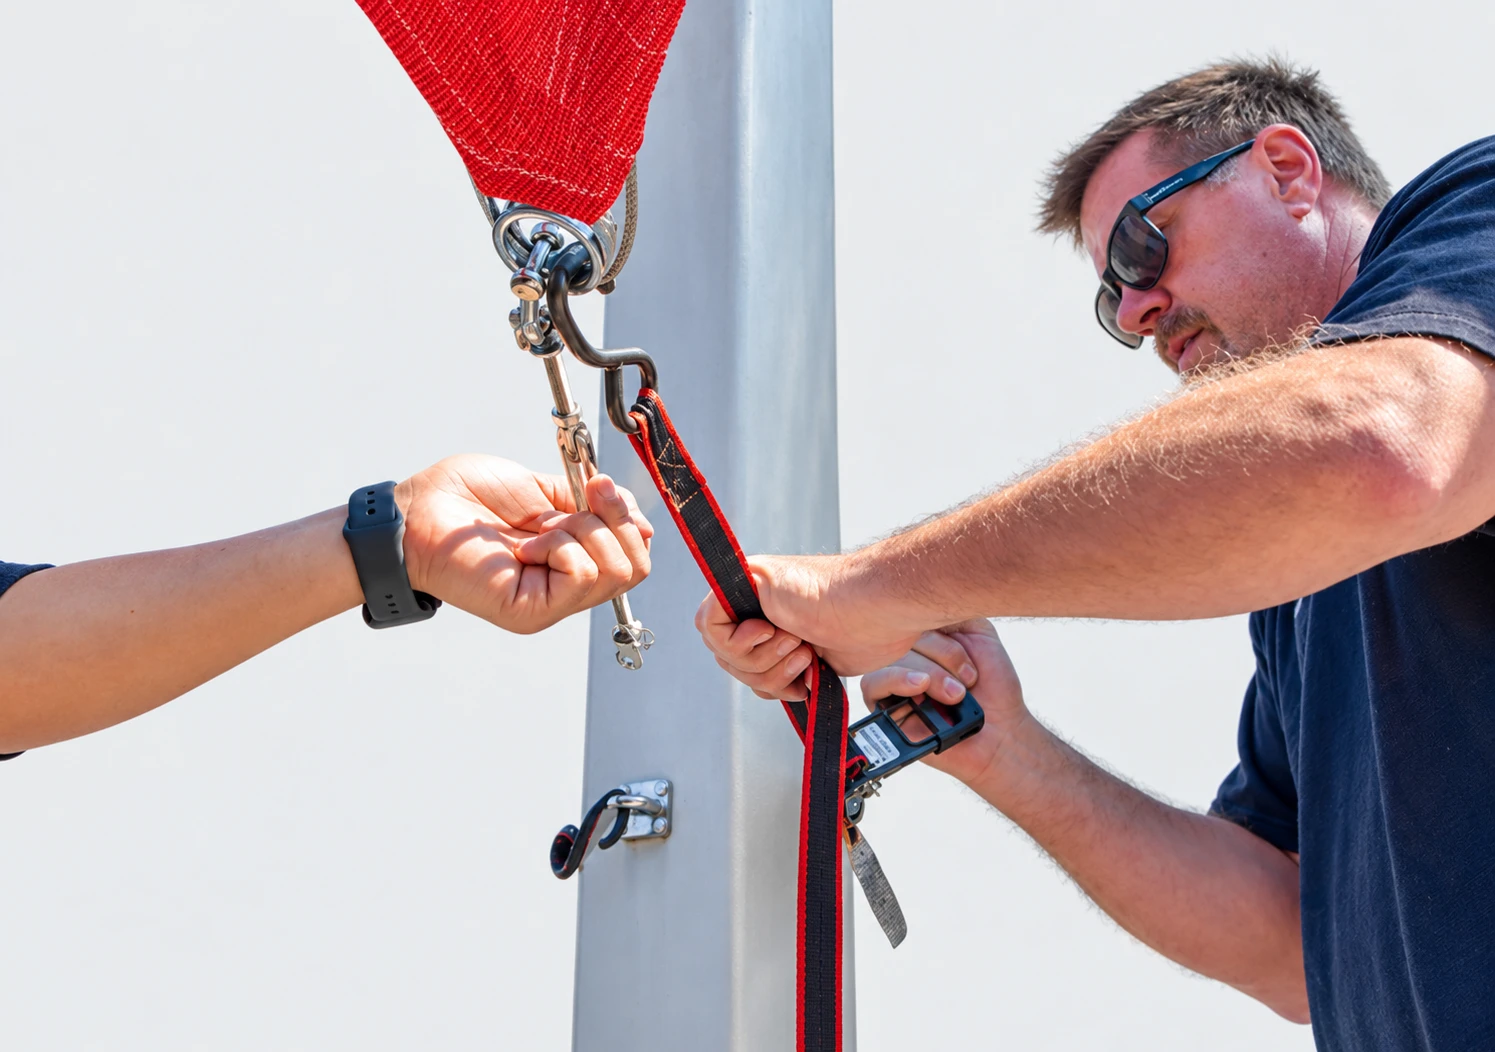
As you get to the third or fourth corners, you will find that the sail will be very tight and difficult to pull toward your attachment point. You will likely need a ratchet strap or rope to help you pull the corner close enough to secure it. Use whichever tool fits the space best to get the job done.
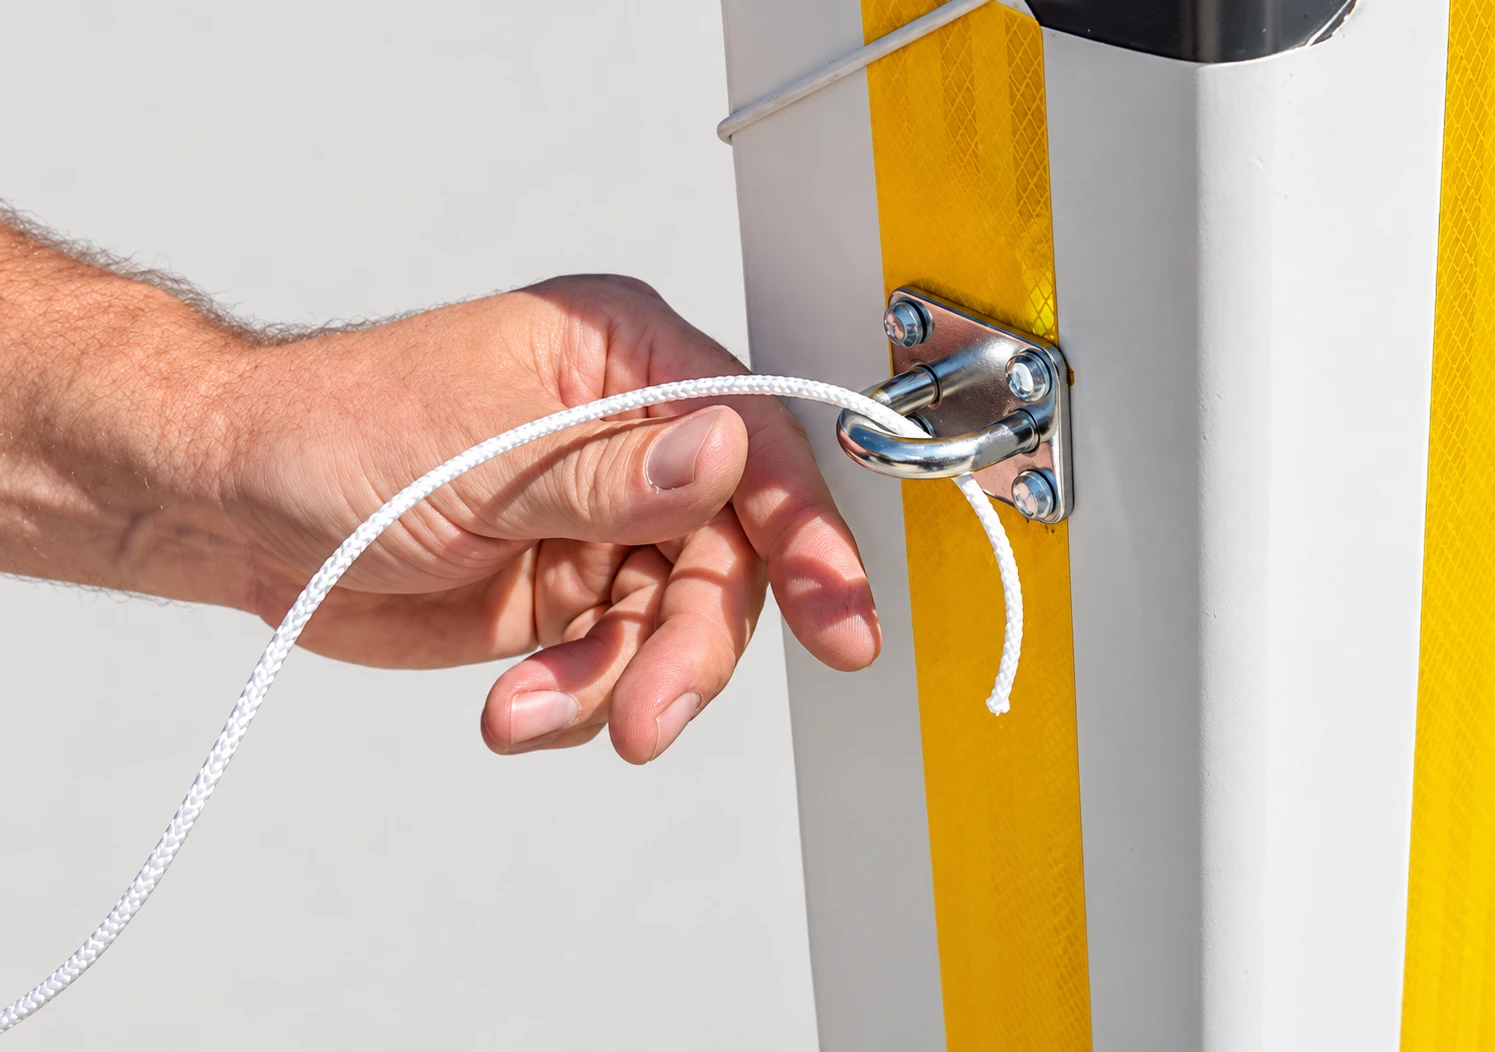
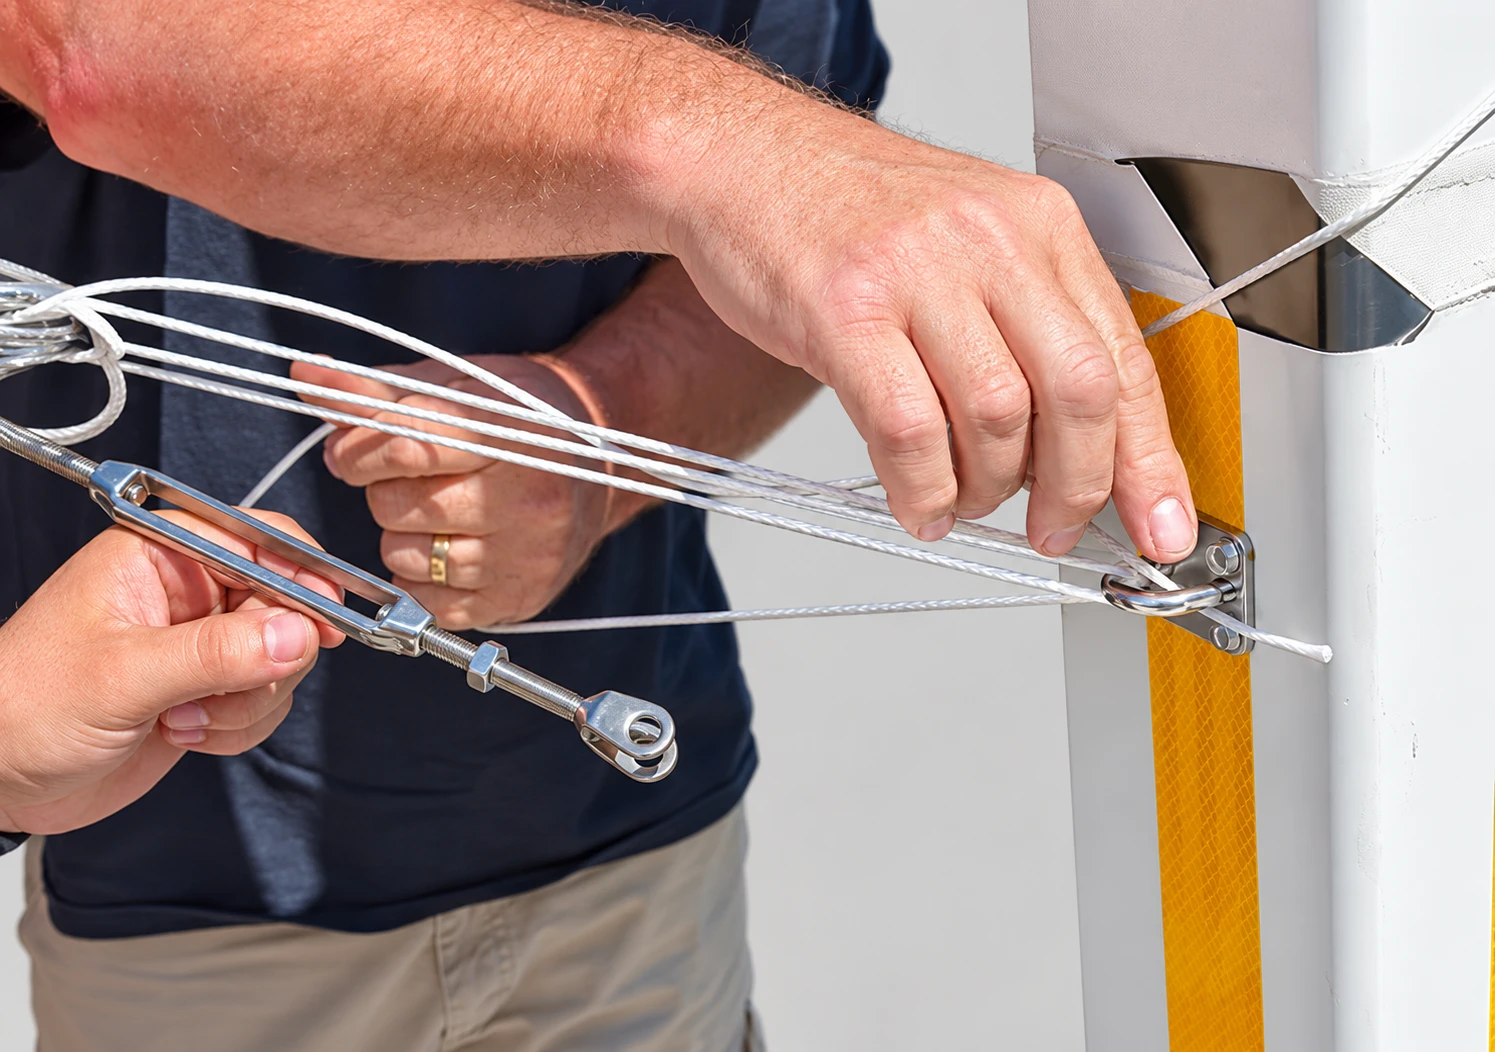
Loop through Ring and attachment point multiple times.
The first corner of the sail will be the easiest to install. Plan to install it in the corner that is most difficult to reach. The last corner of the sail will be the tightest, so plan to install it in an area where there is plenty of room to pull with a rope or ratchet strap.
Step 3: Tighten the Cable and Cable Clamps
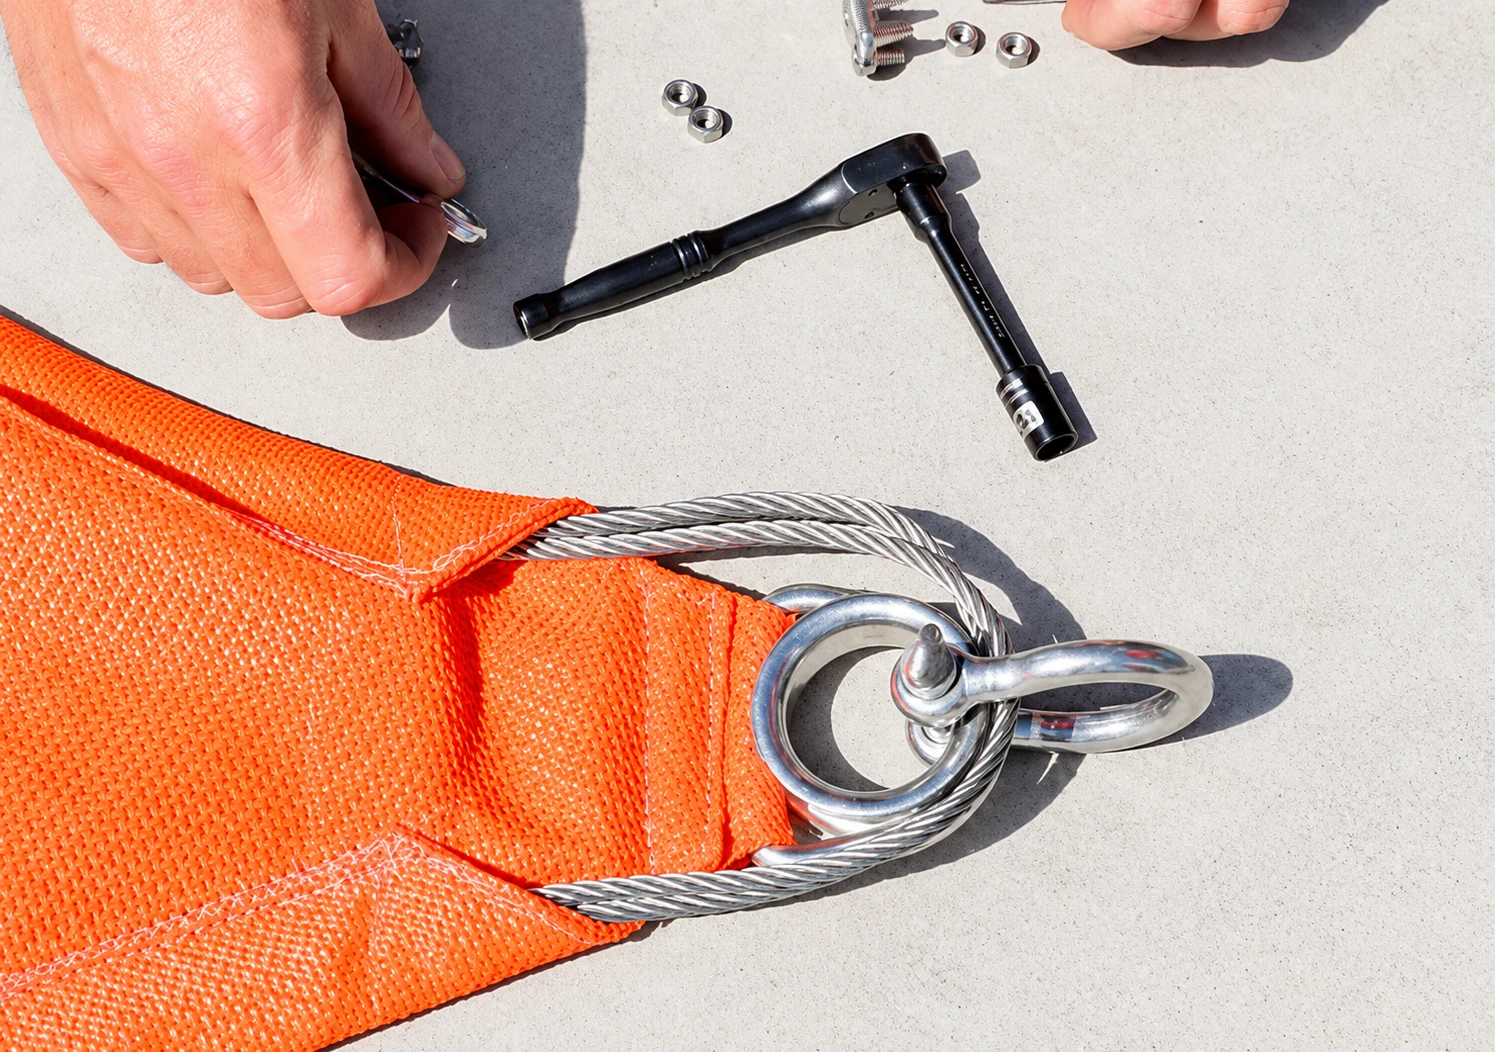
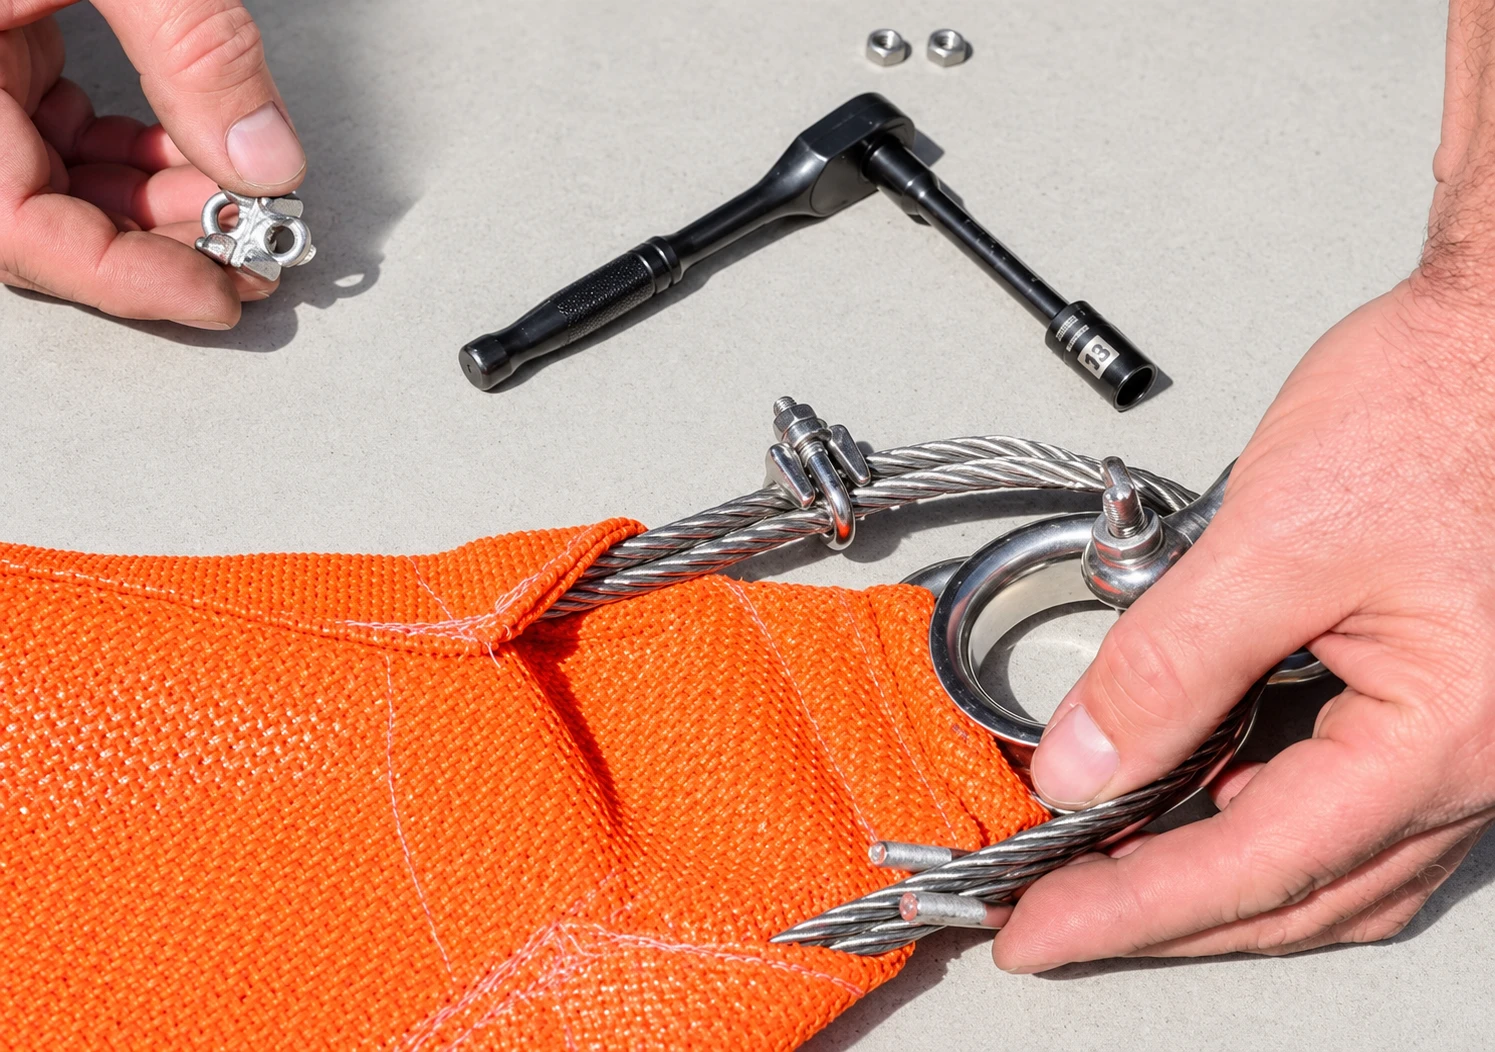
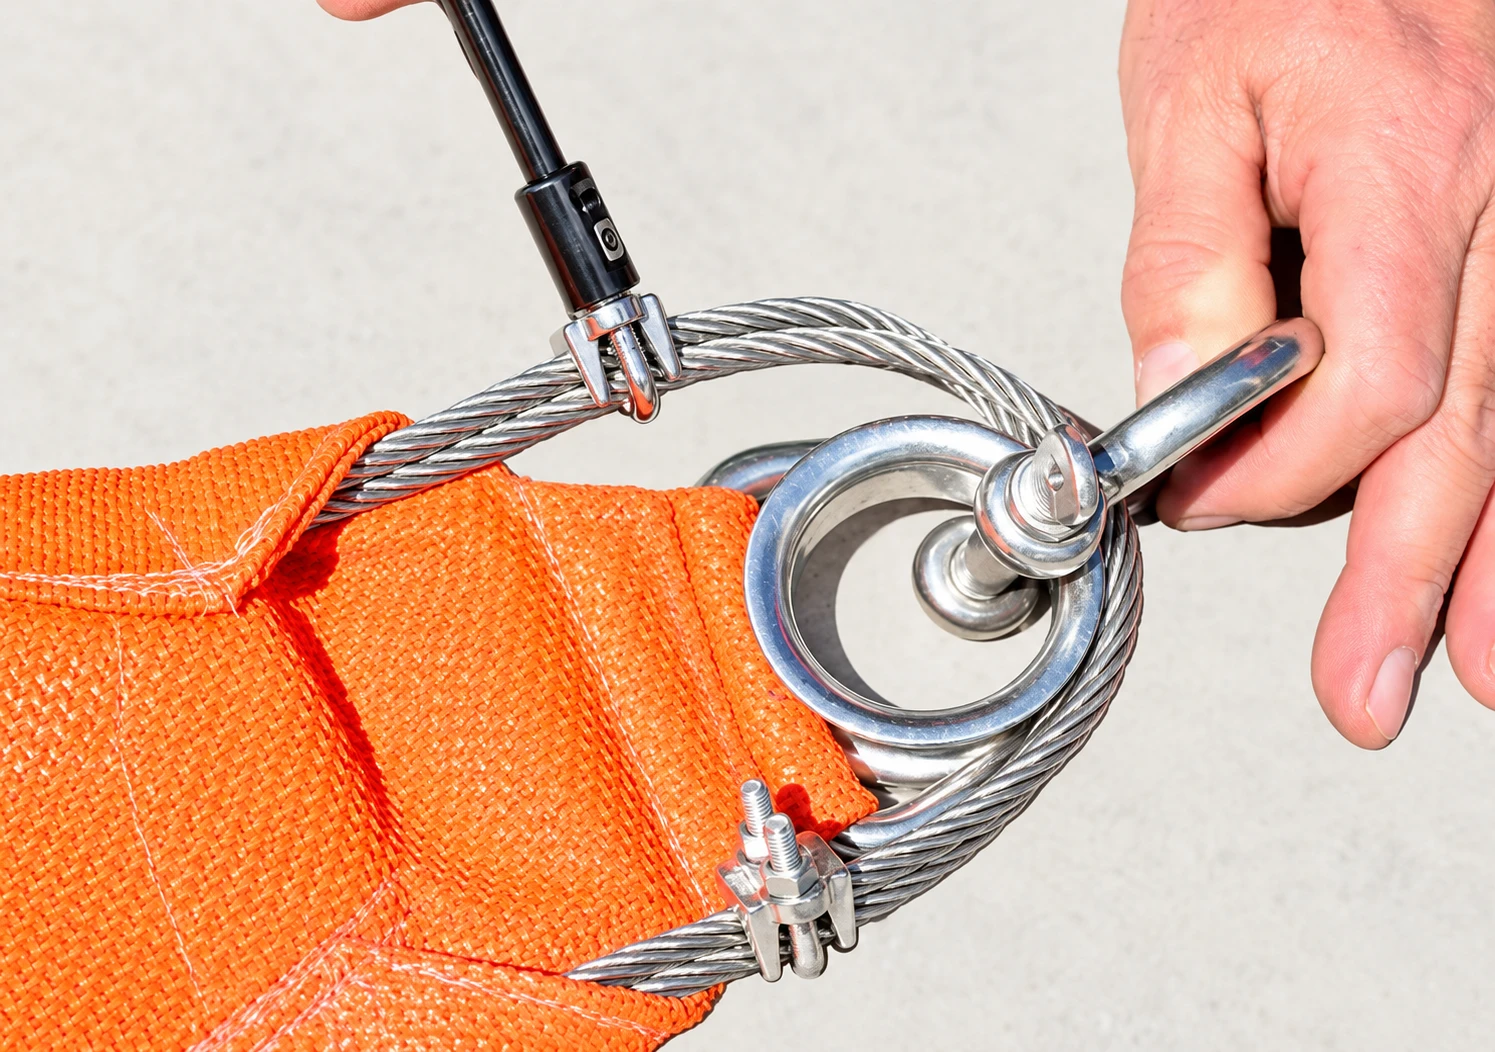
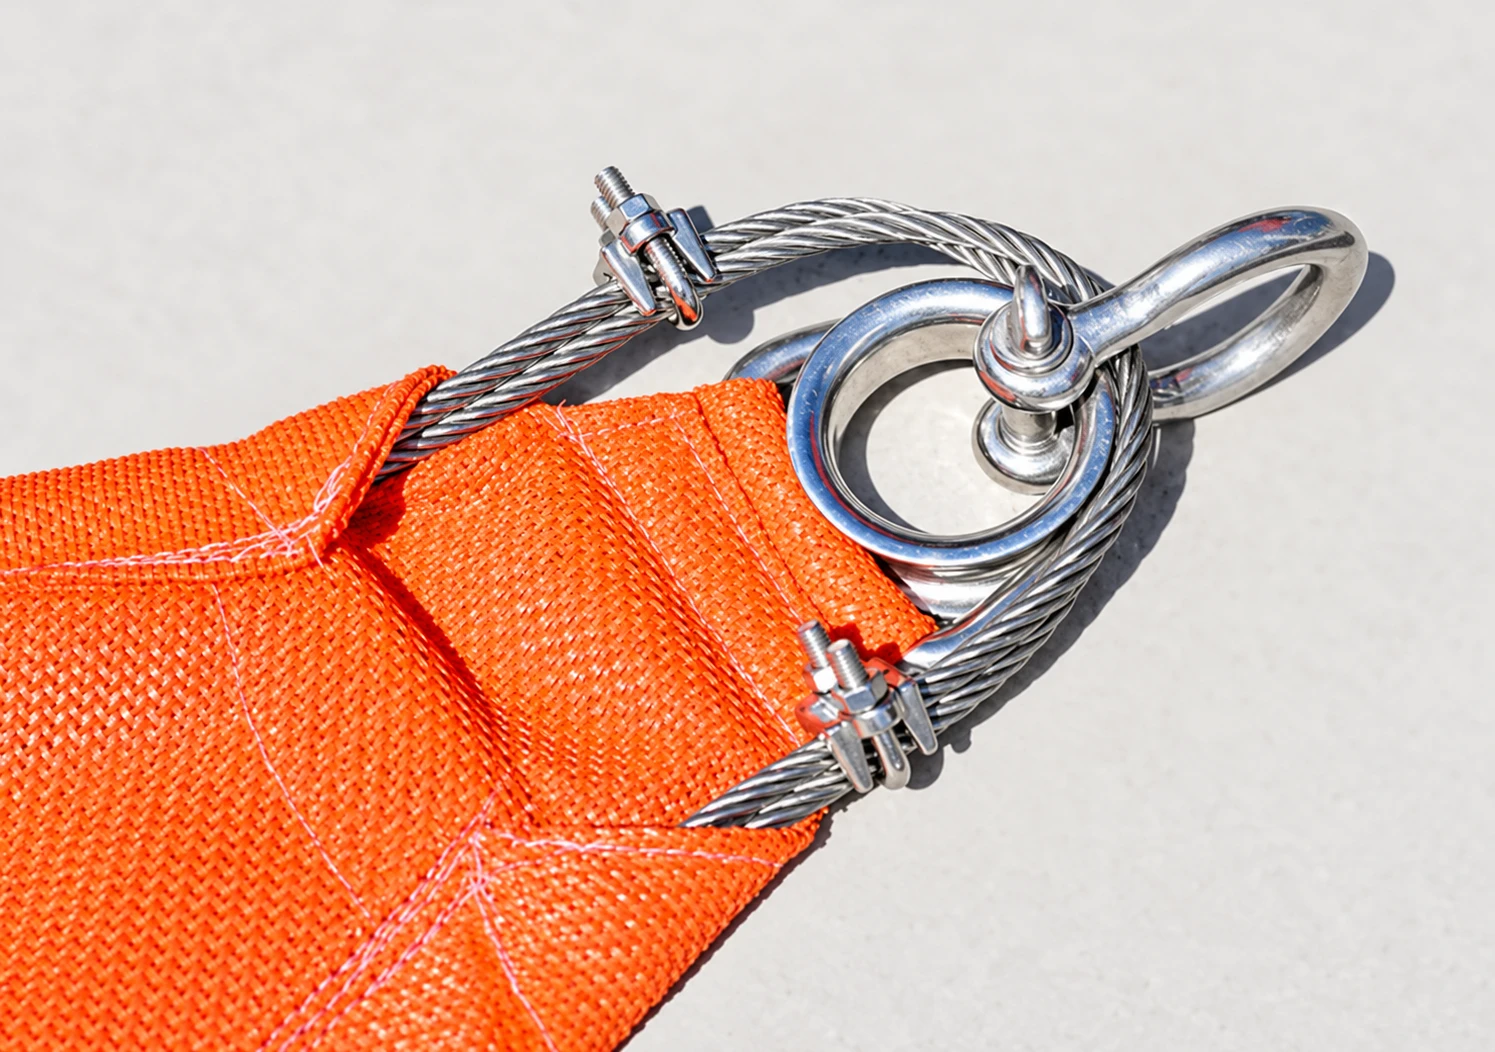
Pull the ends of the Cable hand tight. Check to make sure that the Cable is seated in the thimble at each corner.
Before tightening the Cable Clamps take a look at each corner. Make sure your cable is seated properly in the D-ring thimbles.
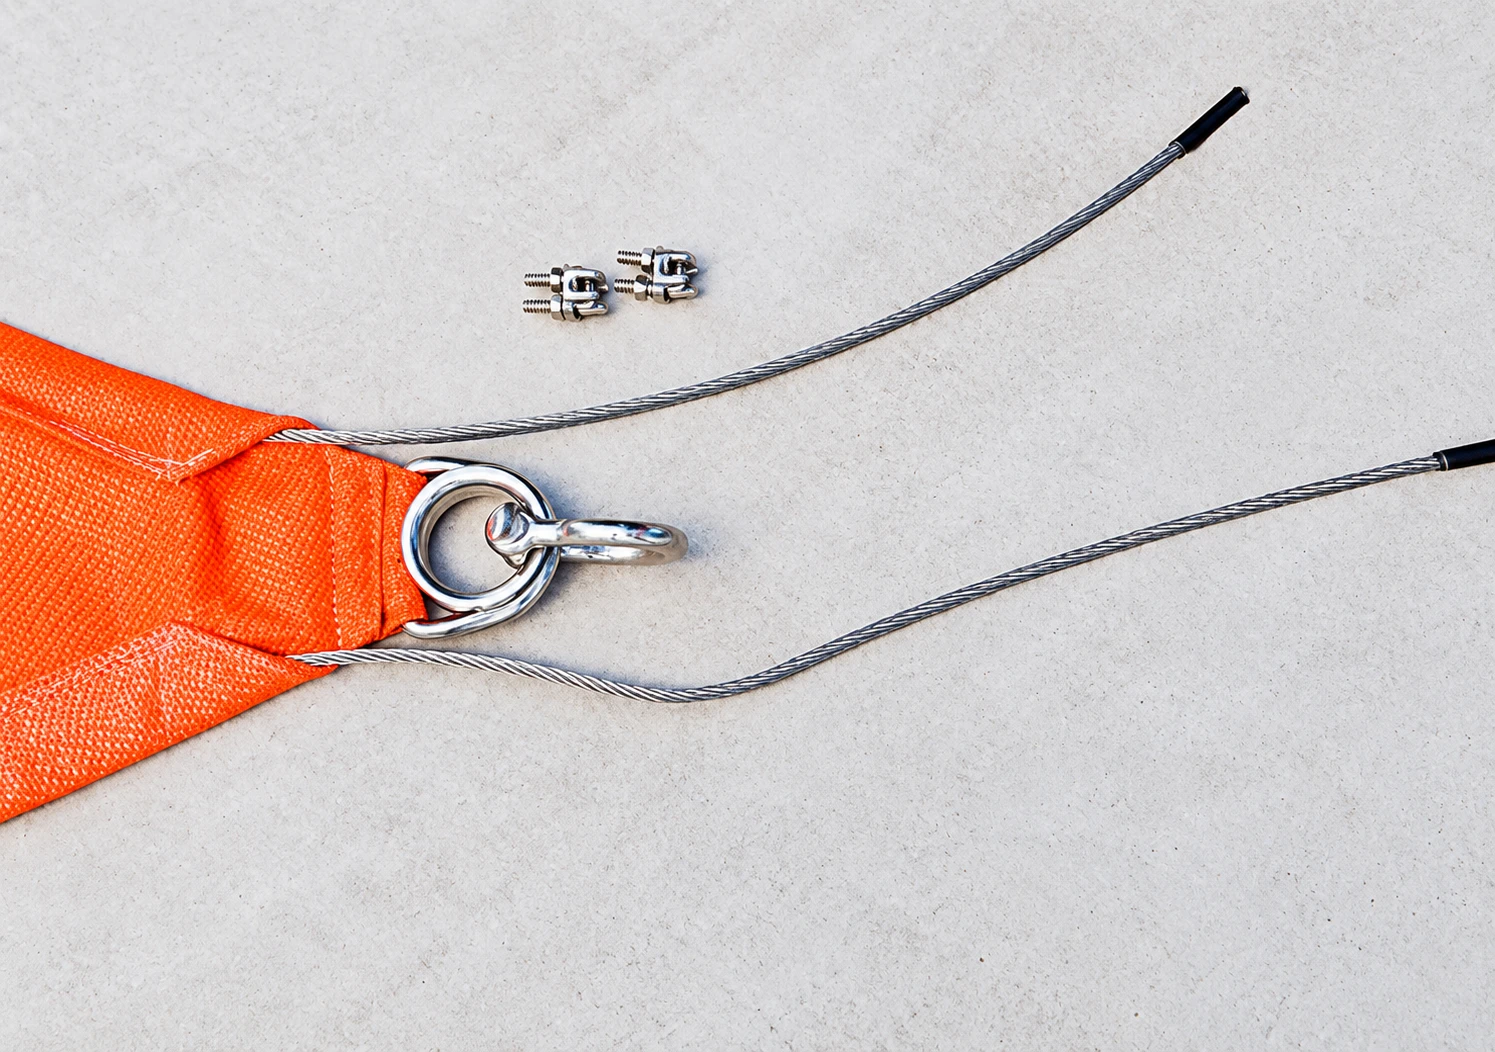
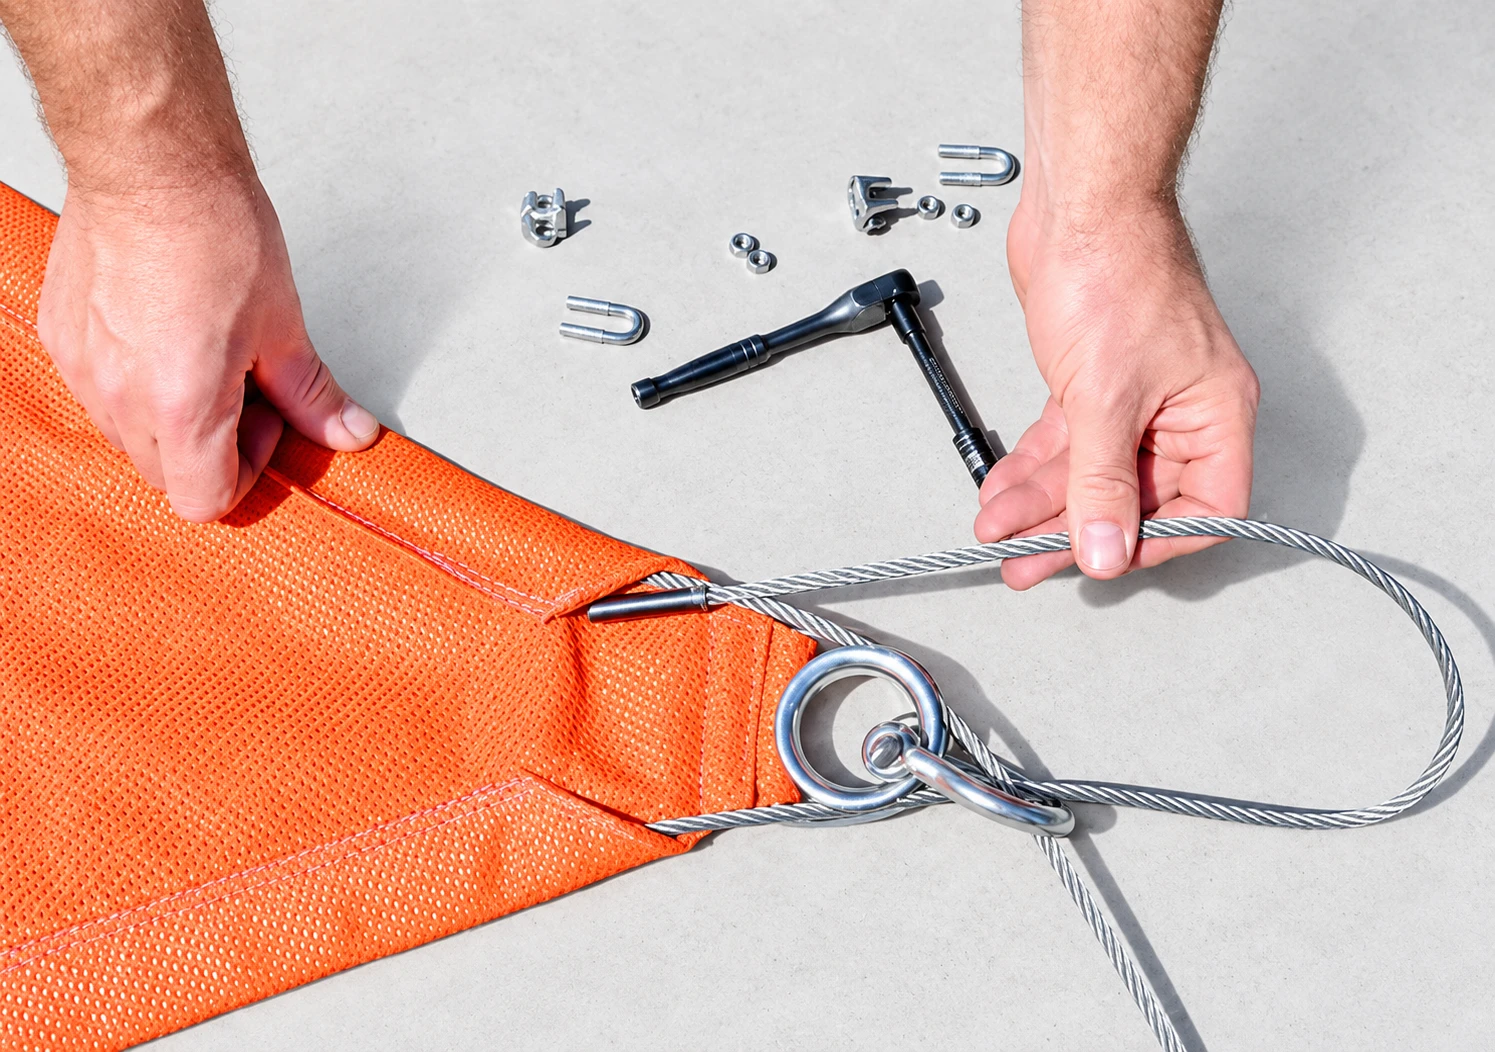
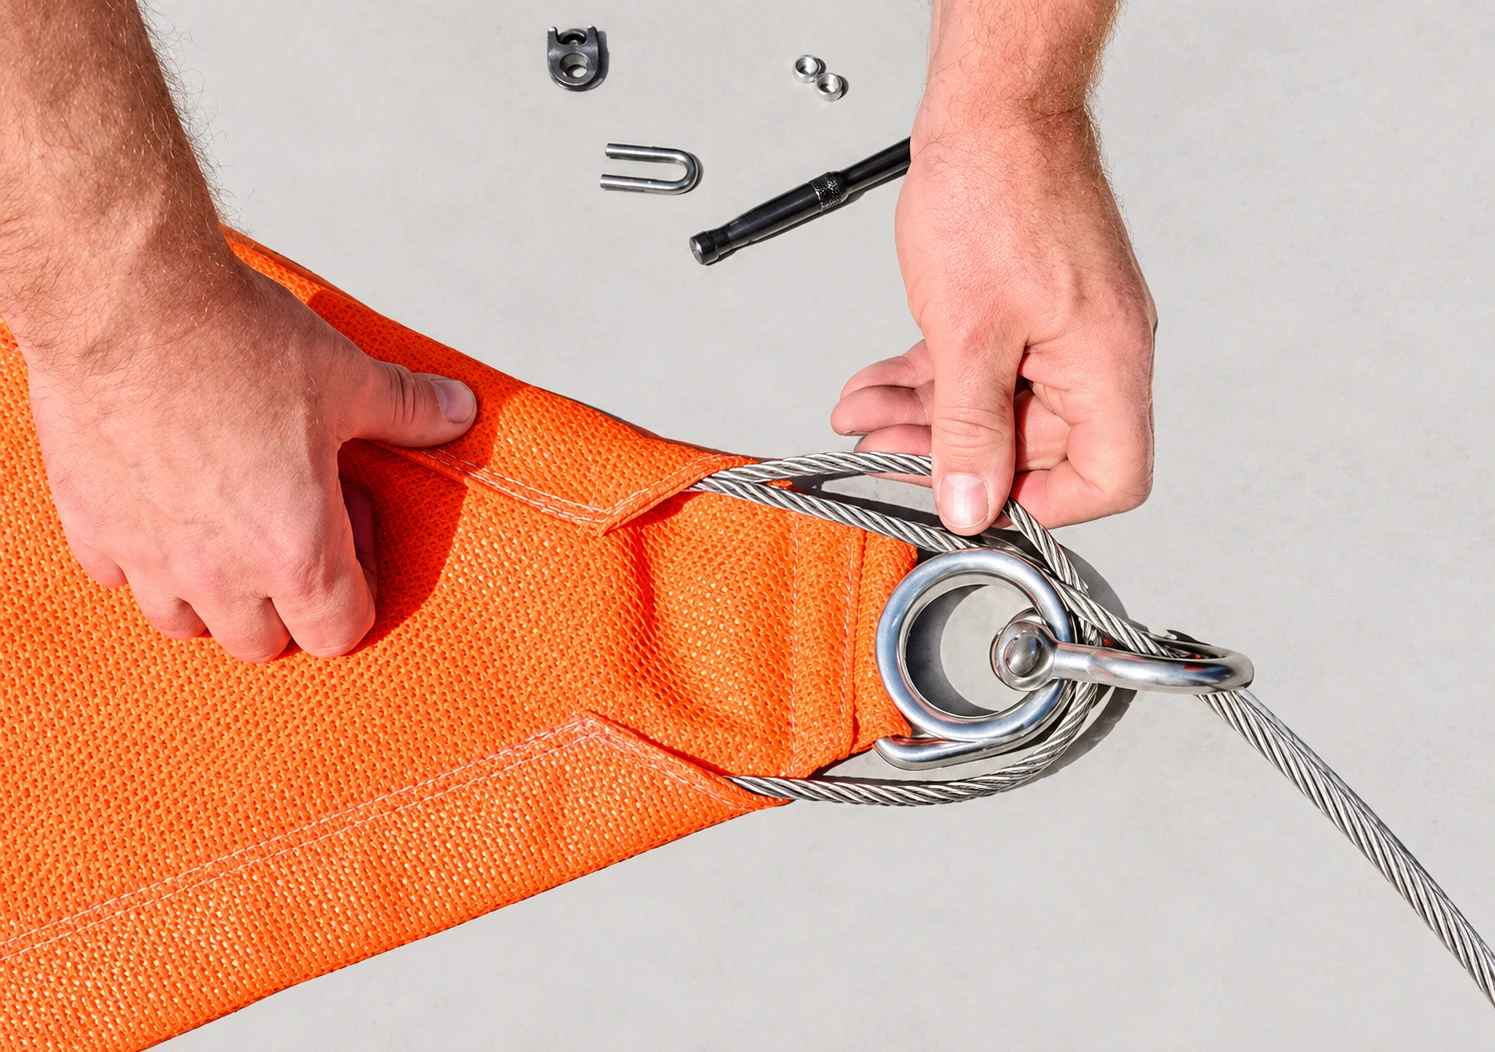
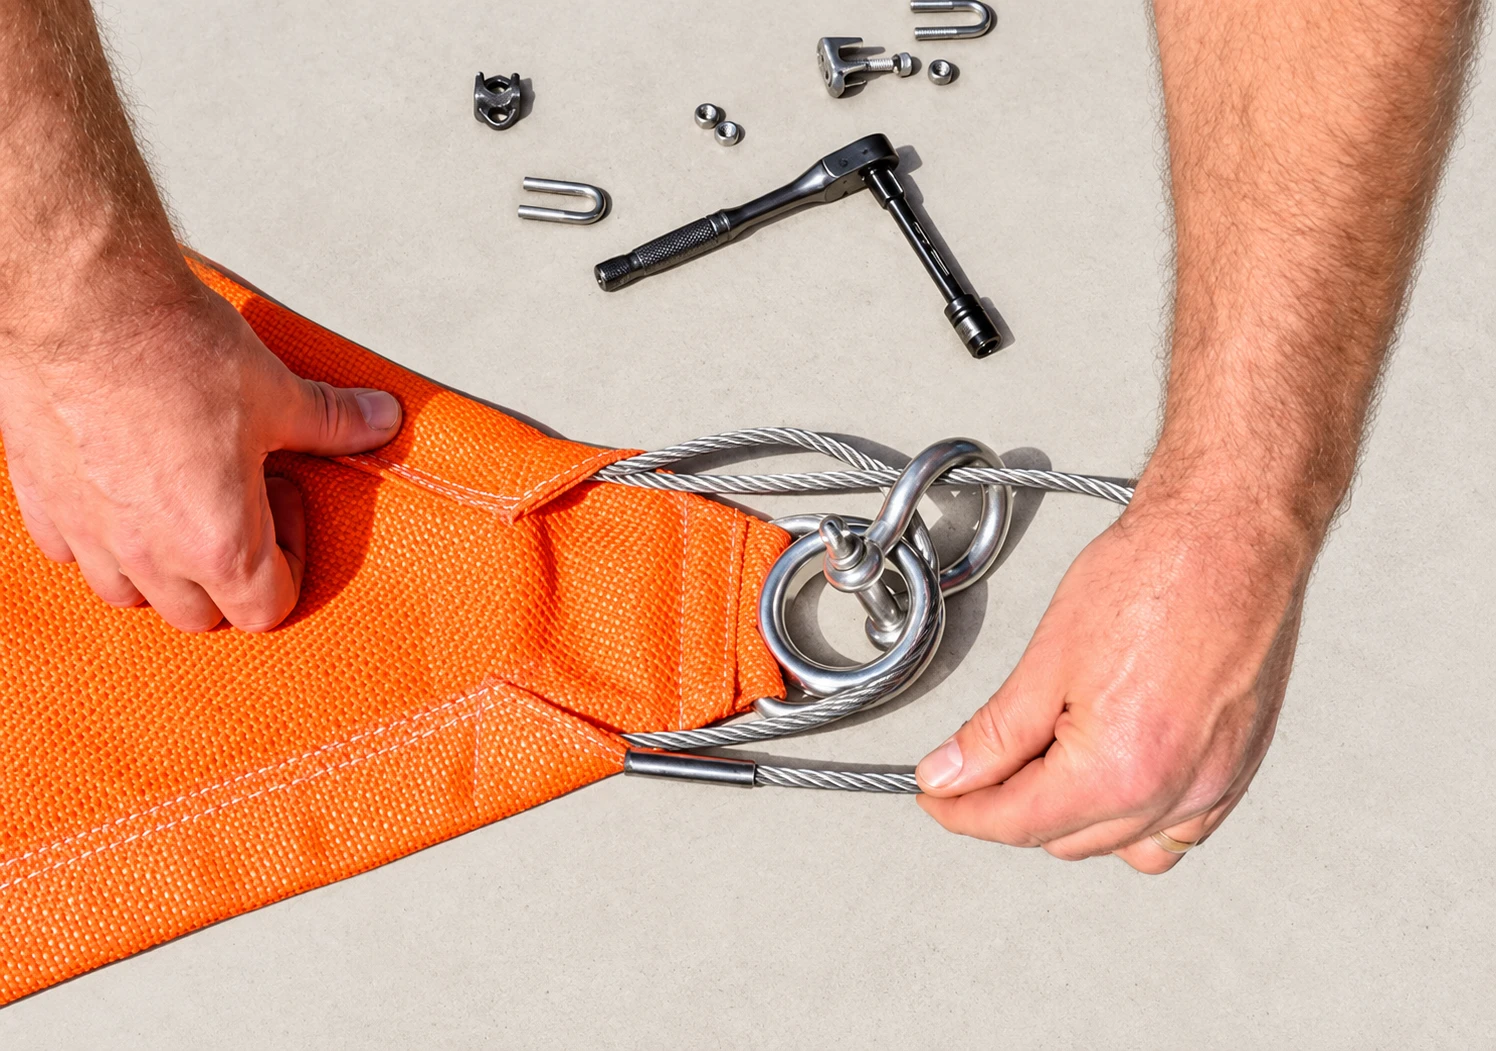
Feed the ends of the cable around the corner hardware and stick them back into the pockets. Place a clamp on either side of the corner hardware. Snug the cable again if needed and tighten the Cable Clamps.
The pictures below were taken with the sail on the ground so that we could properly demonstrate this step. You will do this while the sail is attached.
Step 4: Tighten the Turnbuckles
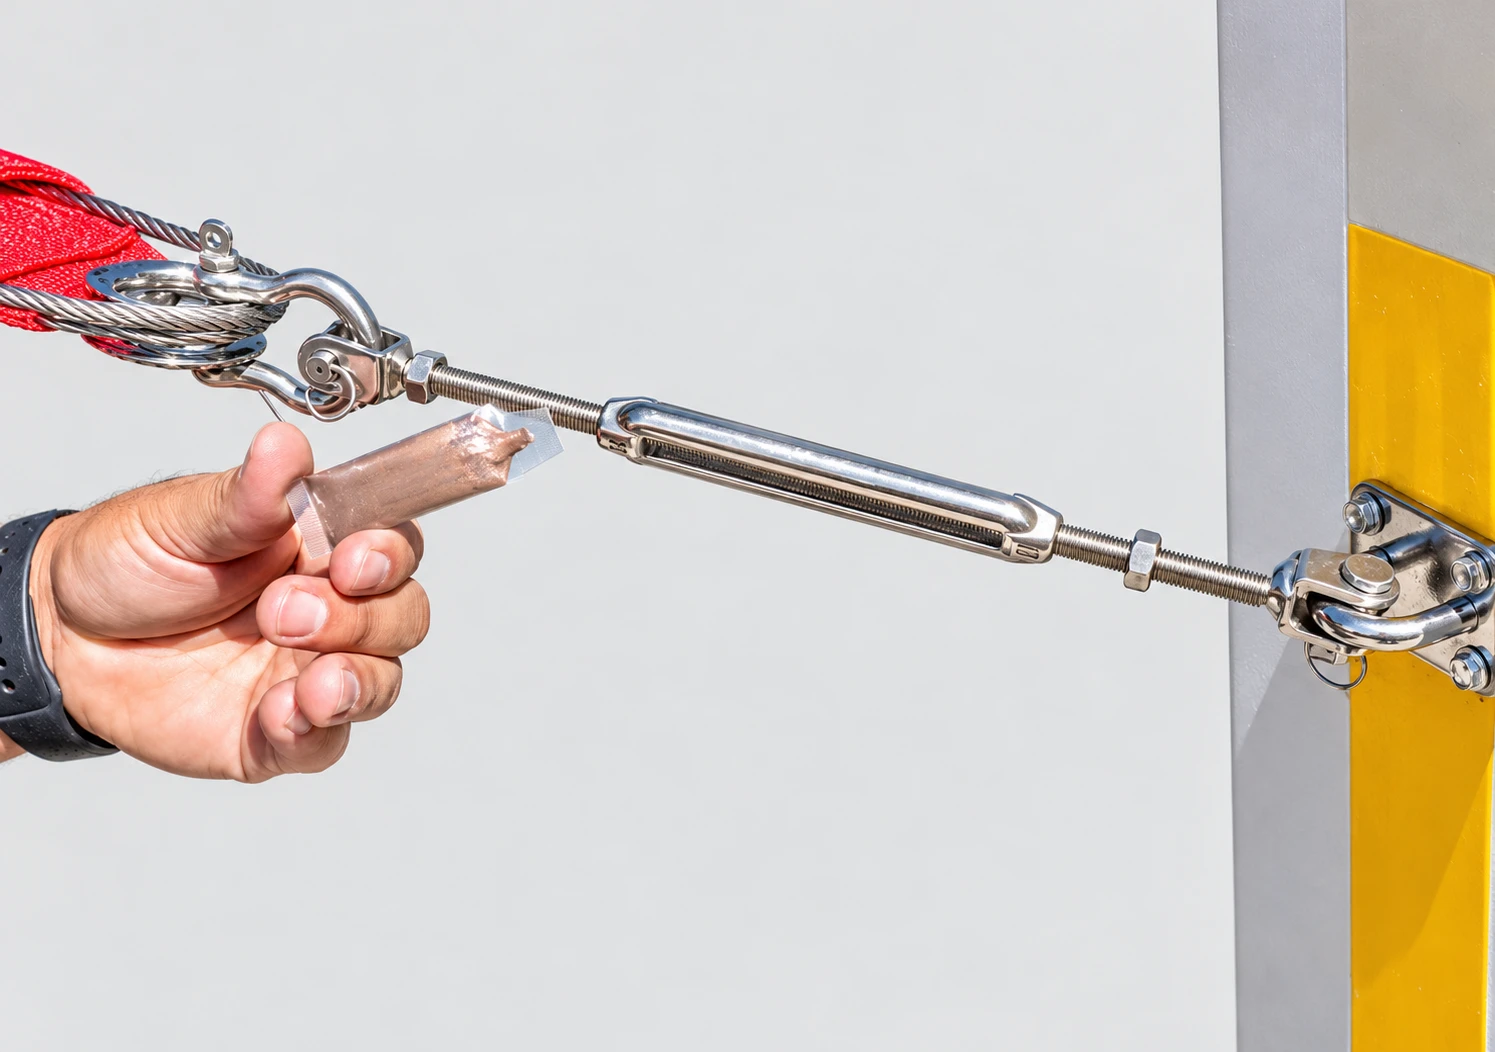
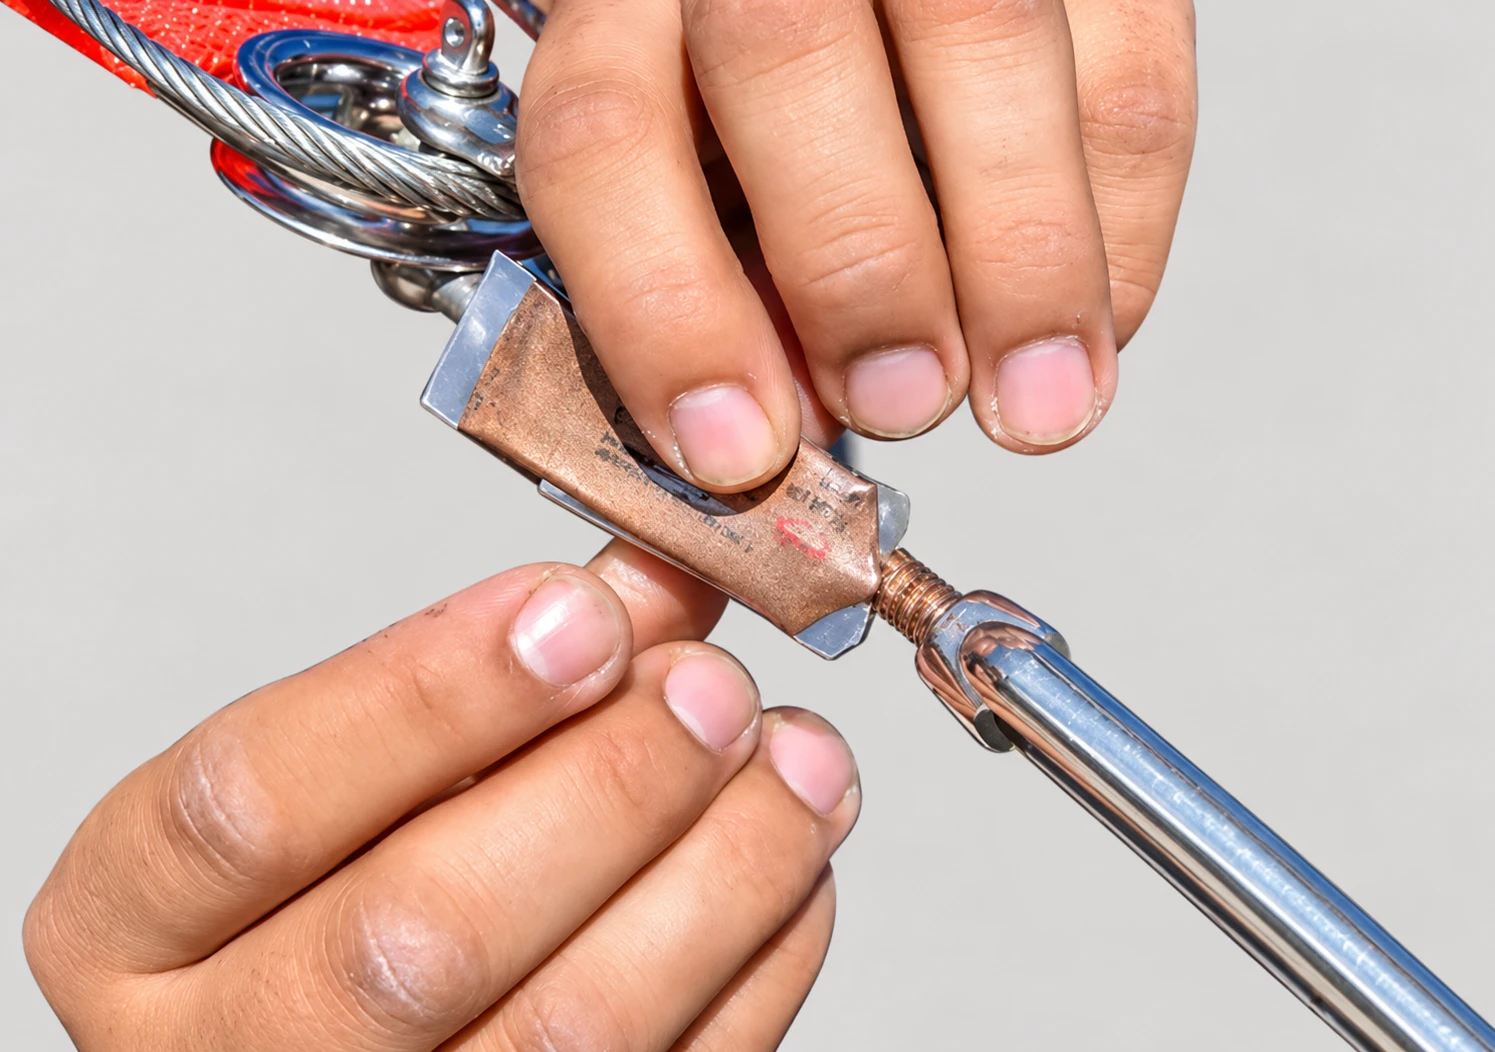
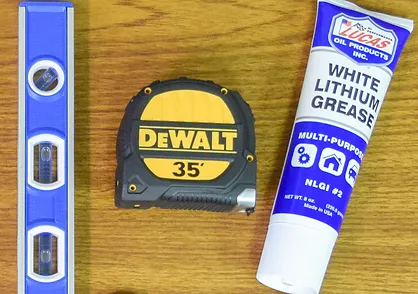
Make sure to lubricate the threads with an anti-seize compound or white lithium grease.
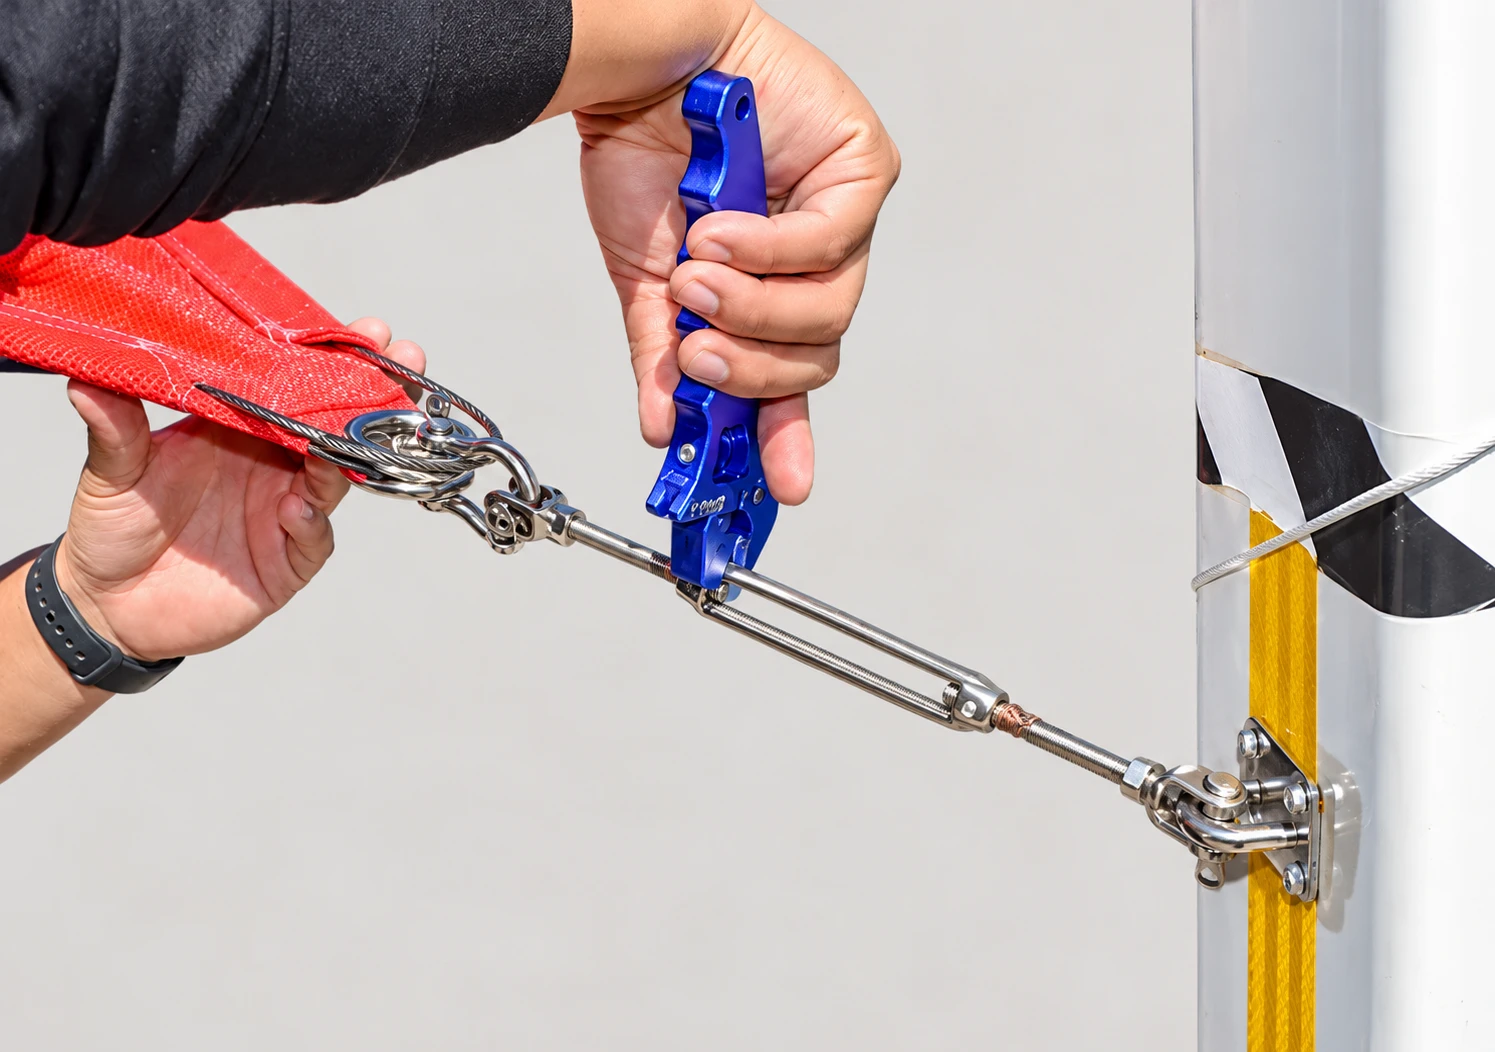
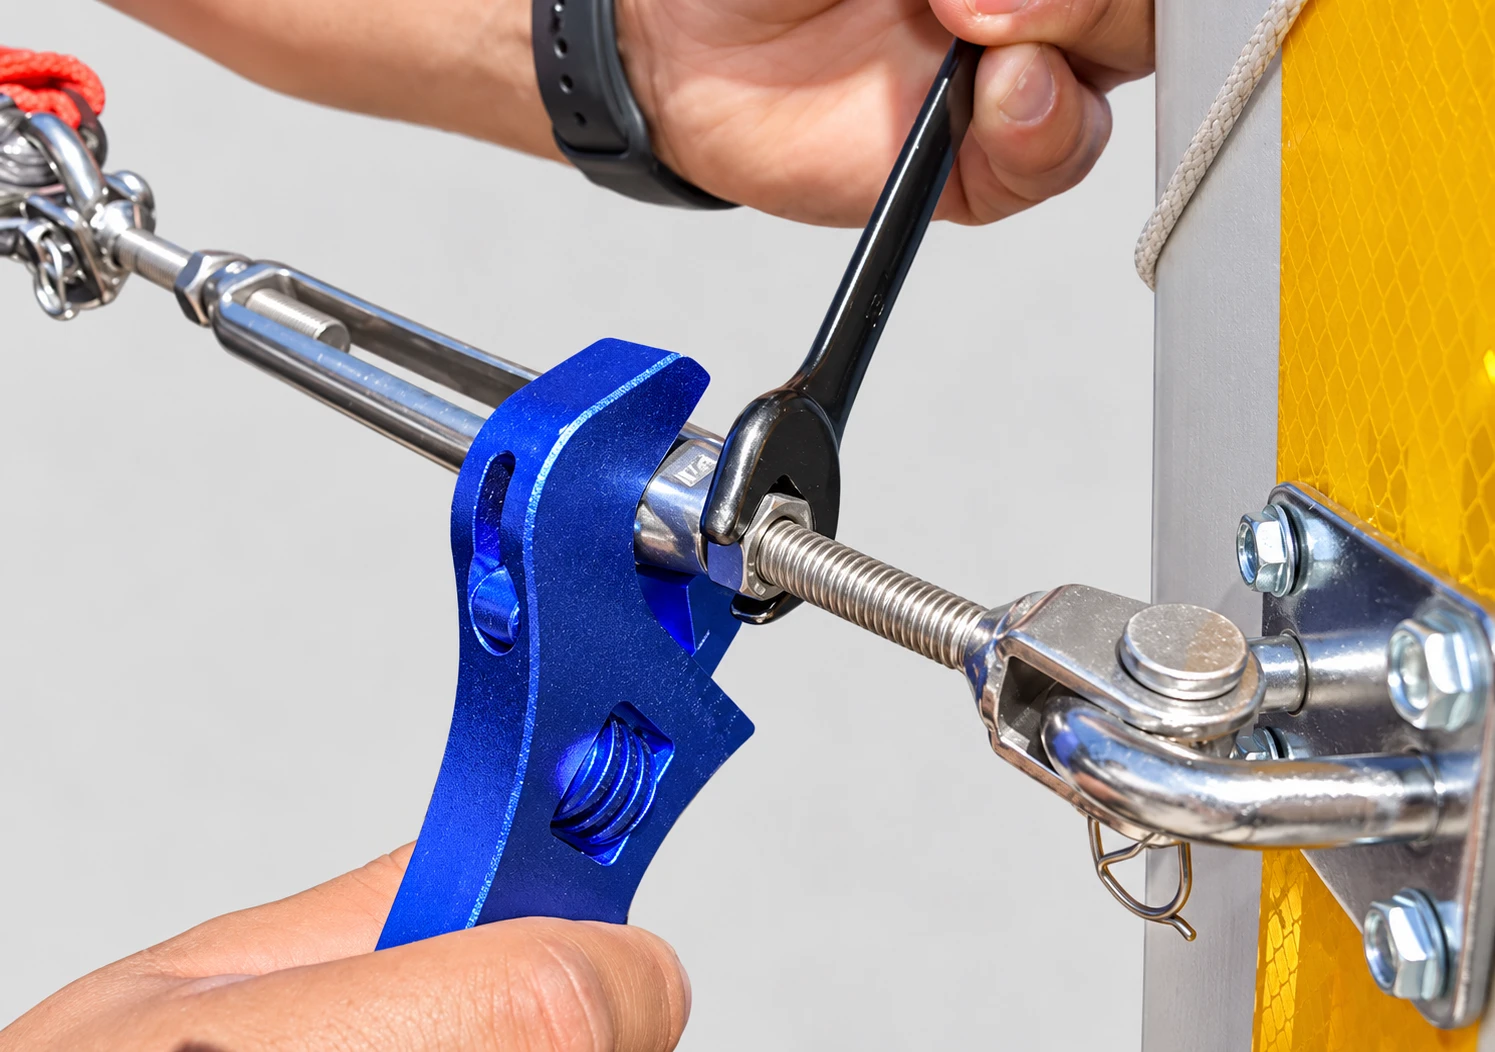
Tighten Turnbuckles until the sail is smooth and taut. Observe the threads making sure to rotate the Turnbuckle body in the proper direction to tighten it. Turning the Turnbuckle body the wrong way will loosen it causing the Turnbuckle ends to fall out and the sail to fall down. Then tighten the lock nuts on each side of the Turnbuckle.
The required tension must be confirmed for the specific sail and hardware. Any small wrinkles will work themselves out over time.
Step 5: Lock and Safety Wire Hardware
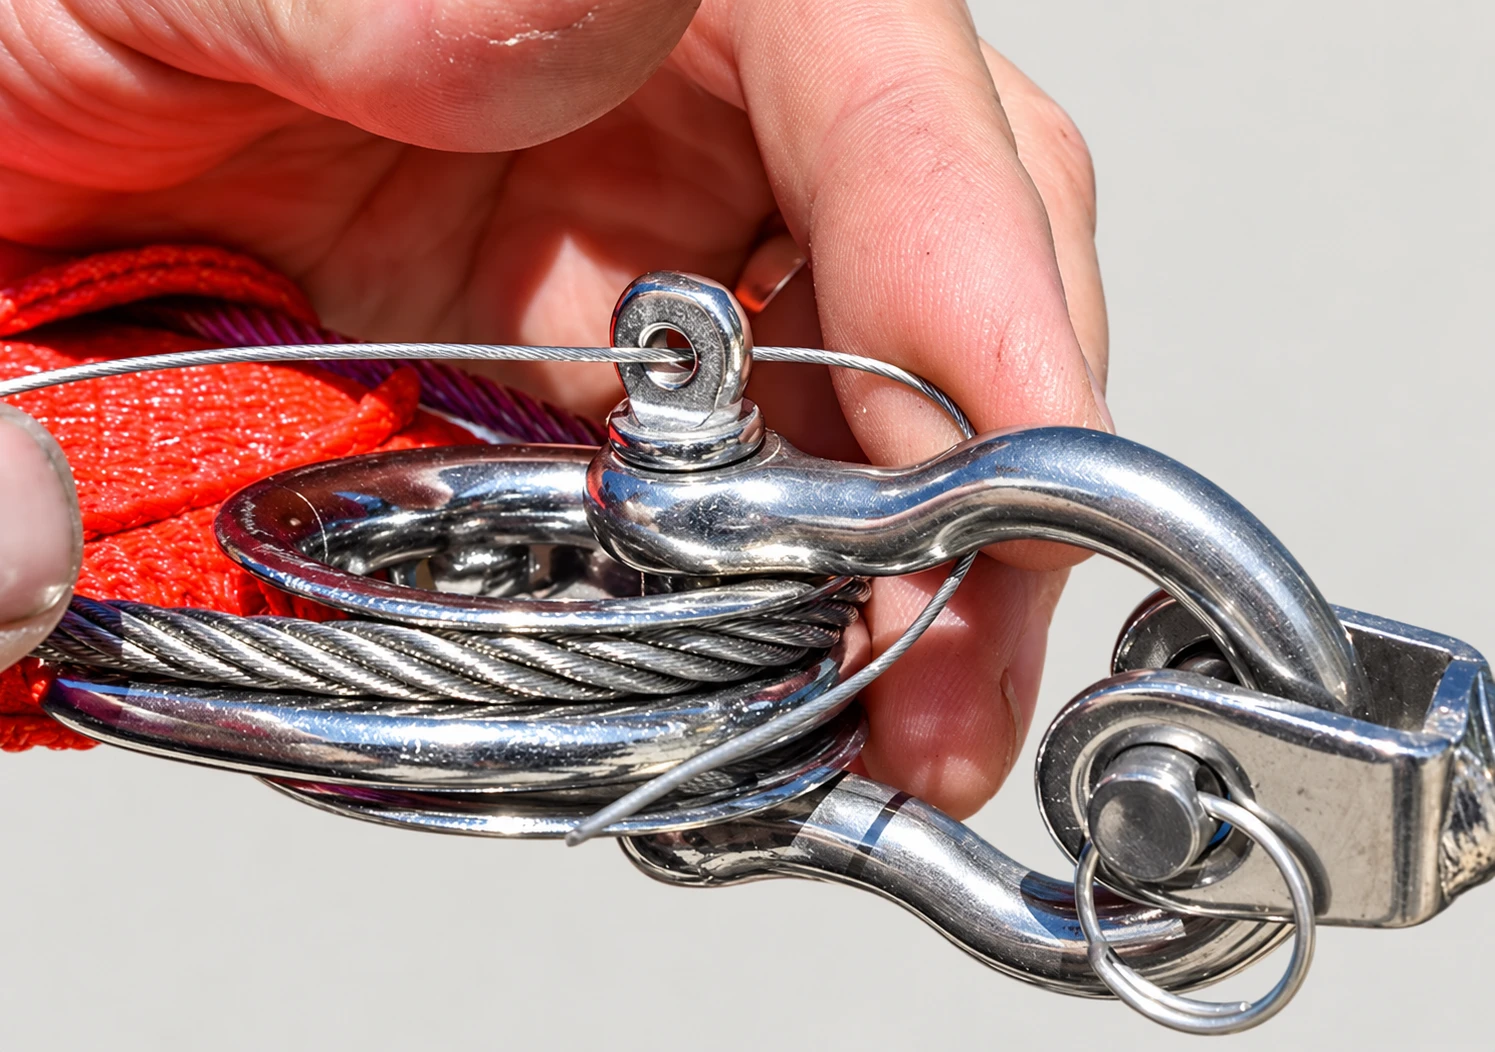
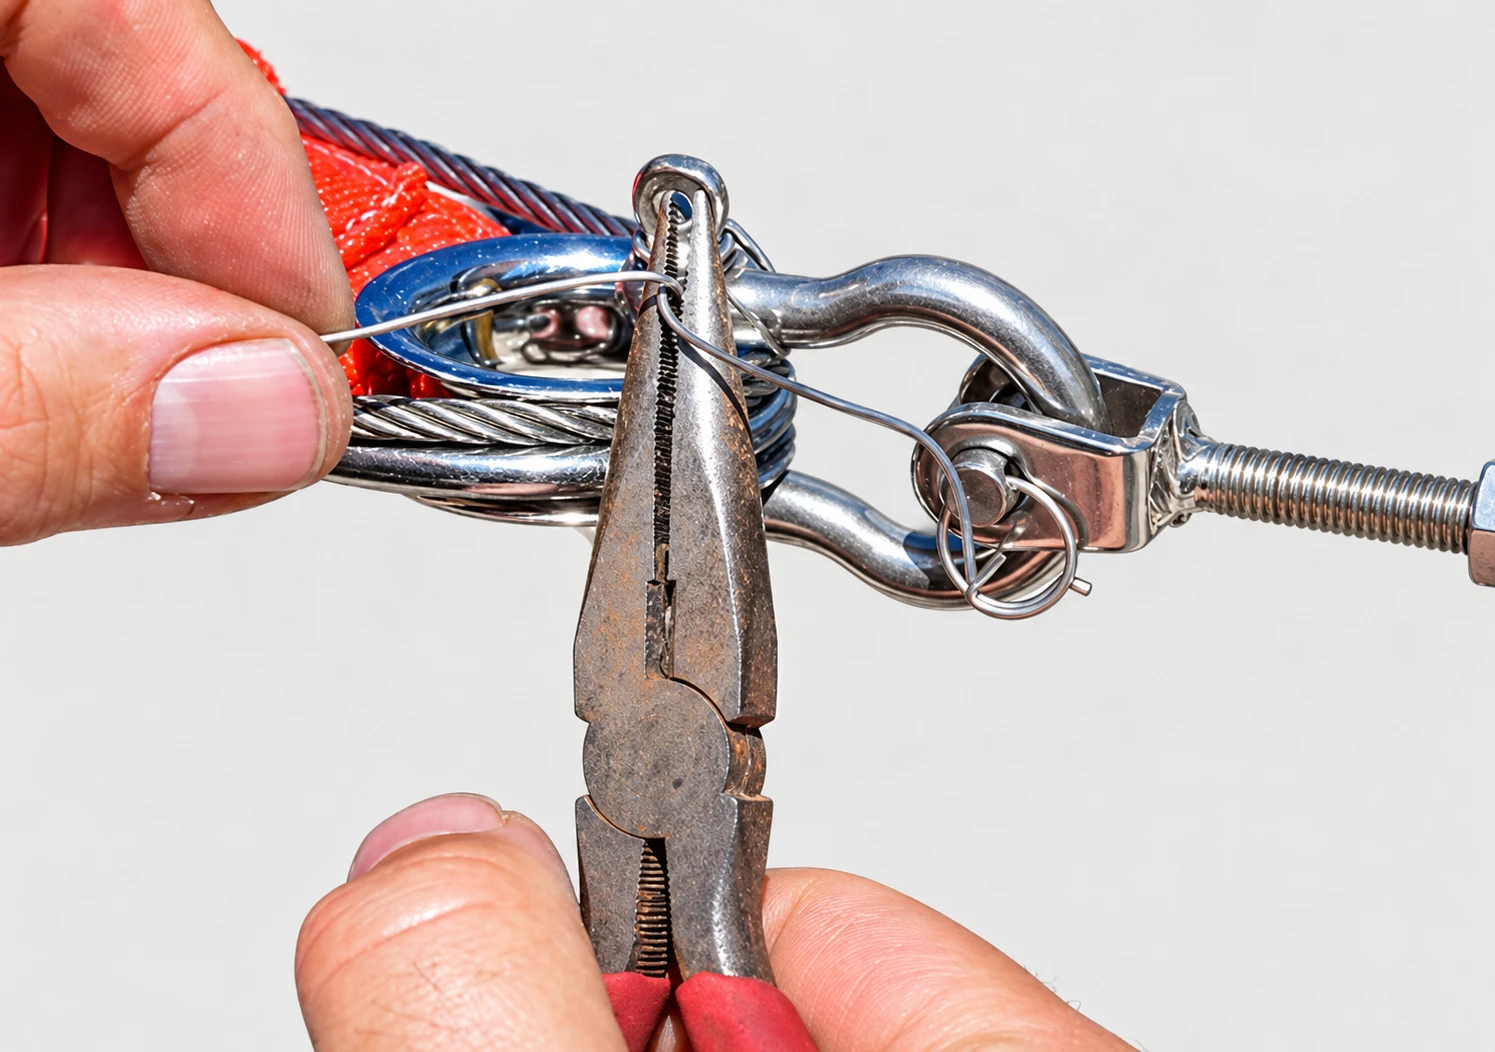
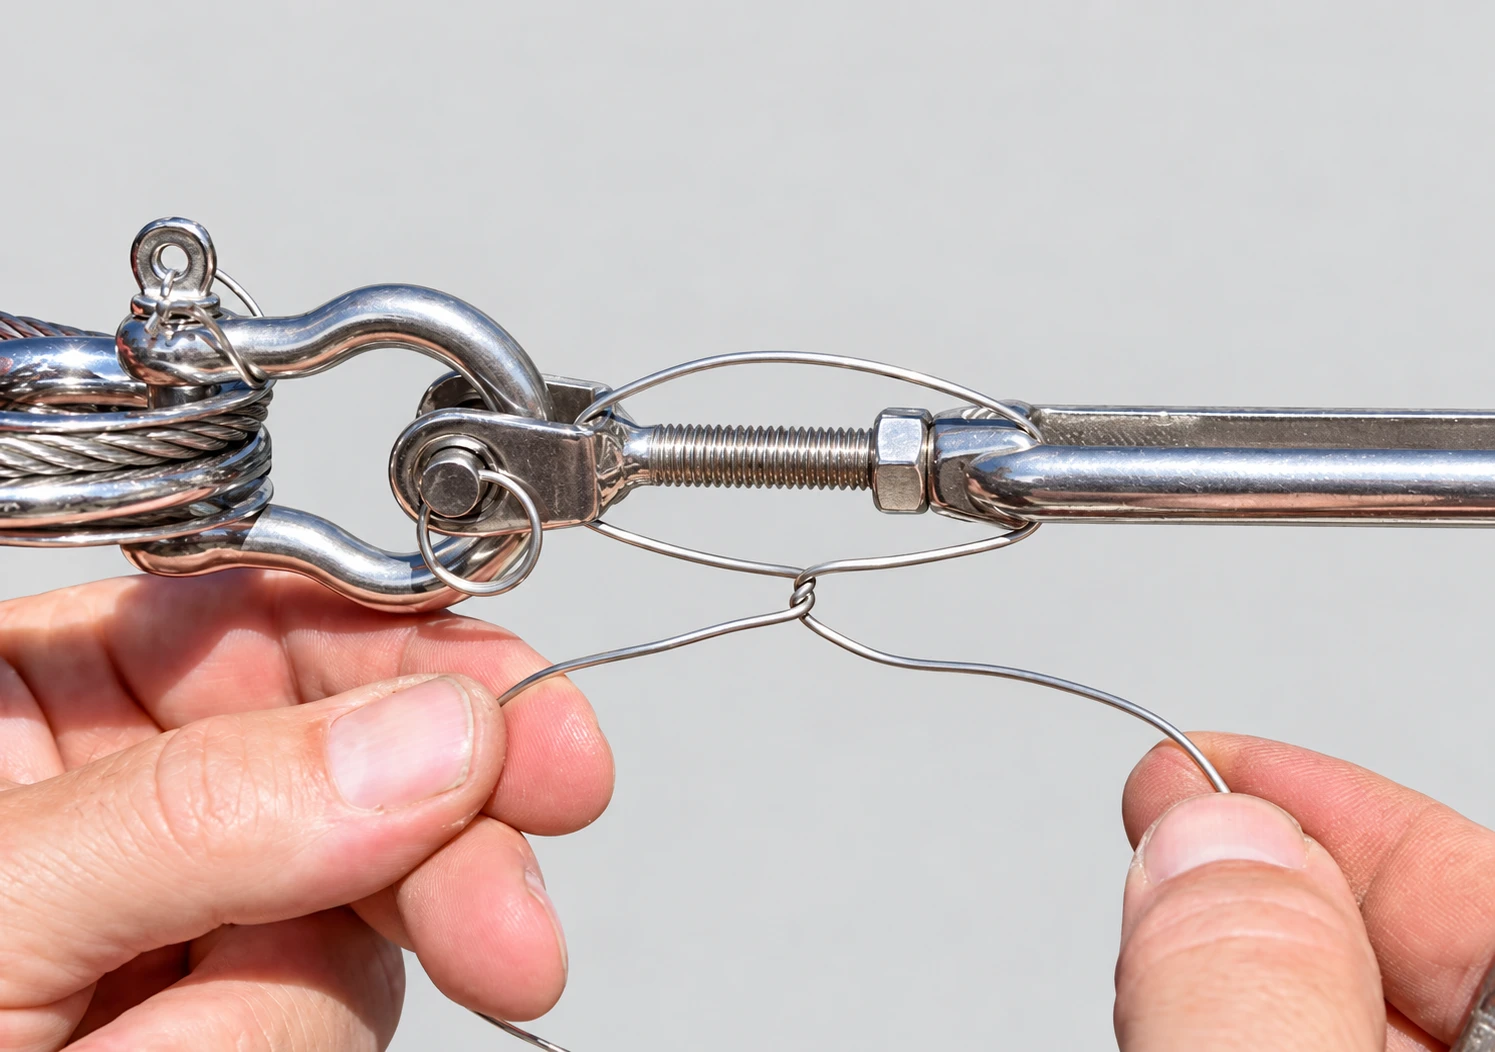
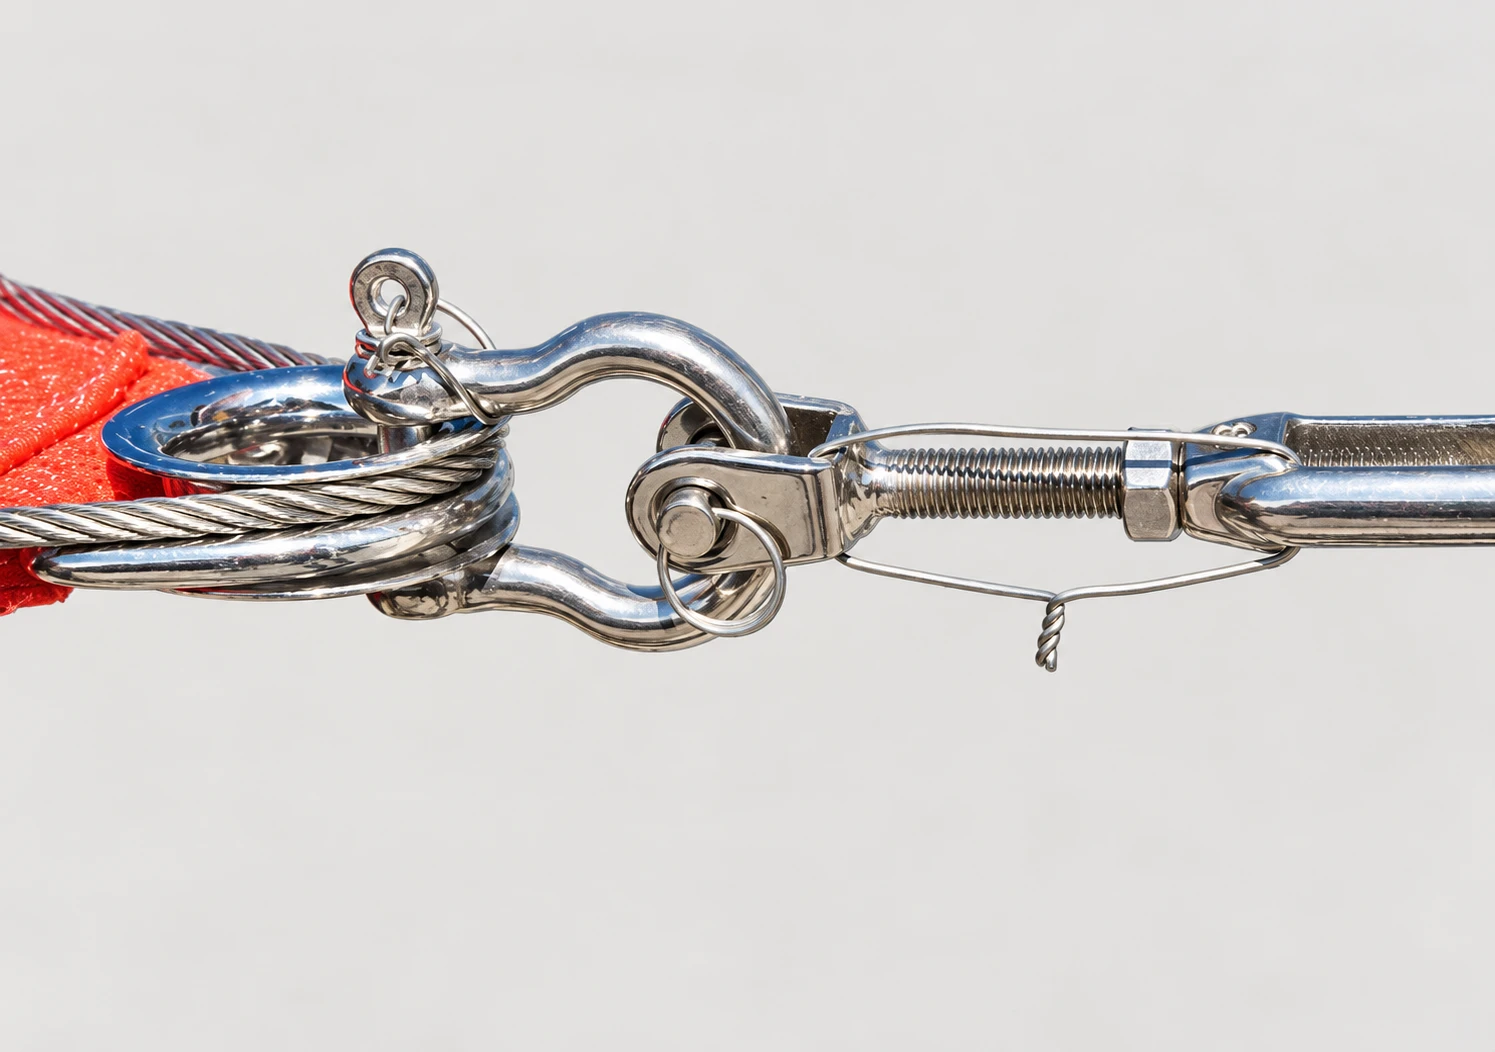
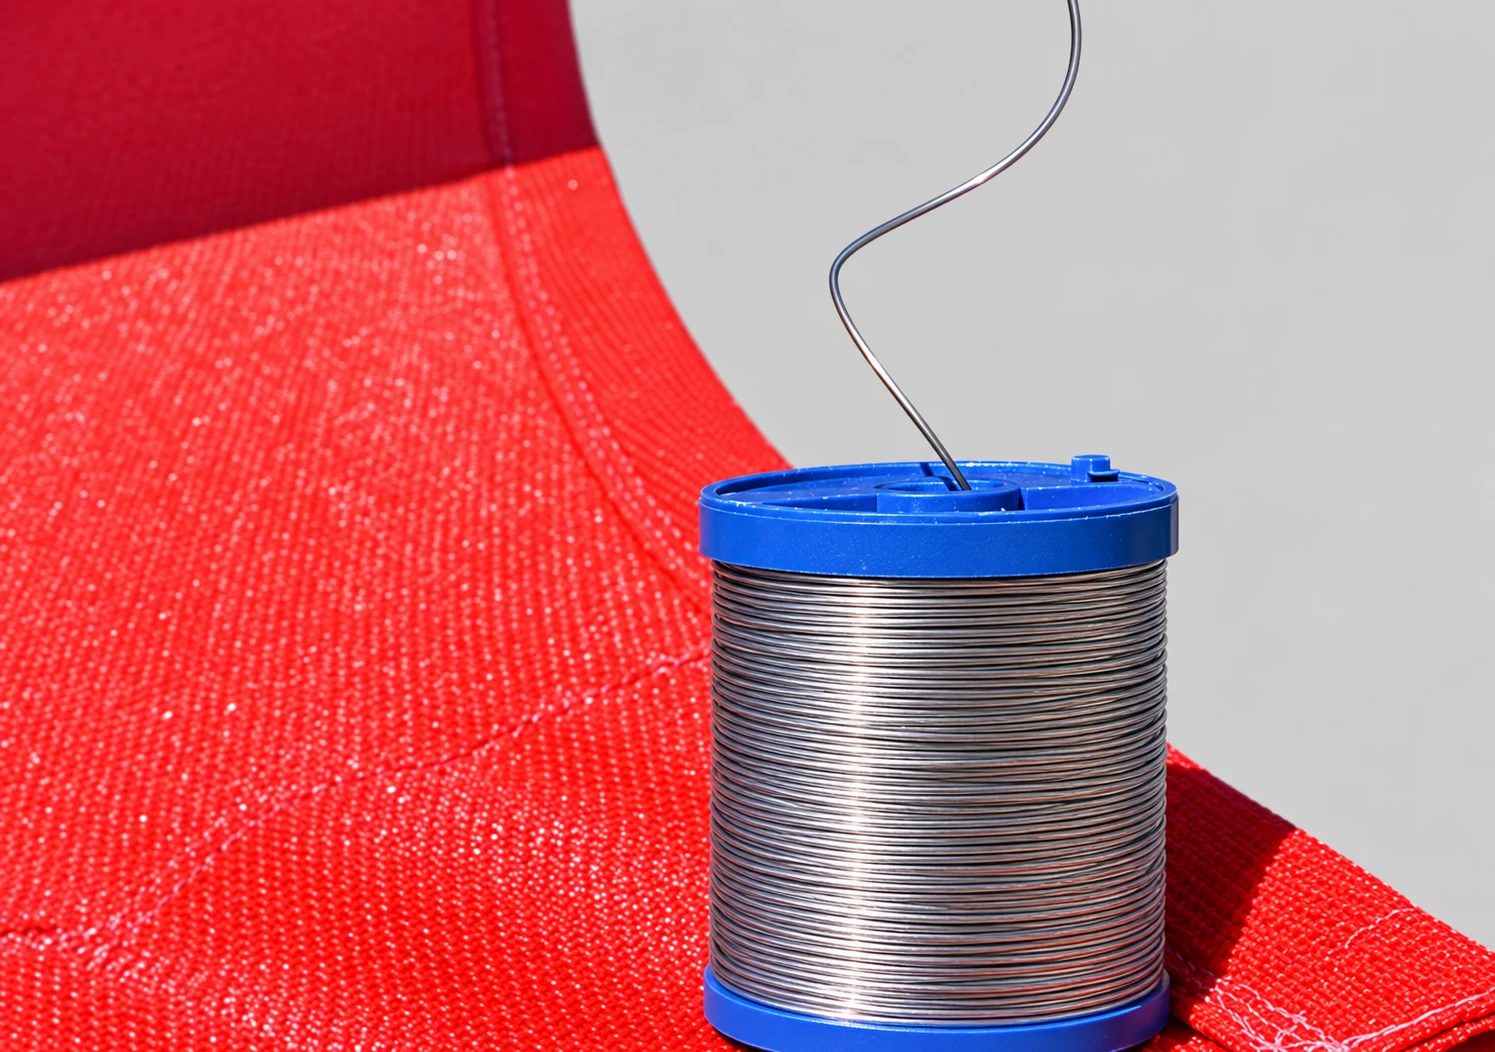
Shade sails will move slightly with the wind. You must lock down the Turnbuckles and put a Safety Wire on the hardware to keep it from vibrating loose.
Last, but not least, we recommend attaching Safety Cables for larger sails.
Corner hardware fails for a variety of reasons, but it is the most dangerous kind of failure. Imagine a storm with high winds has caused your turnbuckle to come loose and the eye bolt to break. Now you have a heavy set of hardware; turnbuckle, bow shackle, and D ring thimble flapping about in the wind causing damage and potential injuries. We always recommend that you take down your sails before a heavy storm with high winds, but as we all know, accidents happen.
A good way to help prevent this kind of accident is to connect a safety cable to the D Ring and your attachment point.
Sail Installation complete.
Don’t skimp on the footings when you install a post.
Take measurements for your sail from eye-bolt to eye-bolt (or point-to-point).
The first corner of the sail will be the easiest to install. Plan to install it in the corner that is most difficult to reach. The last corner of the sail will be the tightest, so plan to install it in an area where there is plenty of room to pull with a rope or ratchet strap.
Final checks and ongoing care
Have the completed installation checked against the project specification. Inspect the sail, anchors, cables and secured fittings periodically. Follow the agreed weather-removal and maintenance instructions, and take sails down before severe storms when specified.
Ask an installation question